
10Micron GM2000 HPS II COMBI


10Micron is an Italian company that is 100% focused on making high-end telescope mounts. From small mounts used by amateurs to large mounts used in professional observatories. The GM2000HPS II Combi is the second smallest in the collection. The total weight is about 33kg, so pretty impractical for any mobile use. However, the mount can be taken apart into two pieces of 18 and 15kg respectively, which makes it remarkably easy to carry around. Maximum load capacity is 50kg. The GM2000HPS is equipped with absolute encoders. These are high-precision devices that allow the mount to know it’s exact position with <20 arcsec precision. And it remembers this position at all times, even if you unlock the clutches and rotate the mount manually. The absolute decoders allow unguided imaging with exposures up to 15-30 minutes.
For unguided imaging, a mount-model is required. This model is built by taking images at several positions and plate-solving those images so that the actual RA and DEC can be determined. A model needs at least 3 points, but the more points, the better. With enough points, the mount can correct for tracking errors and flexure, atmospheric refraction, etc. Building a mount model can be automated using software such as MountWizzard4, which is specifically designed for 10Micron mounts. This mount is permanently stationed at the observatory in Spain, where the models typically have 80-99 points. One of the benefits of using mount models is that small deviations in polar alignment or levelling are automatically corrected. If polar alignment is not completely perfect, there is a small risk of field rotation, but only when imaging at high altitudes (>80°) and long exposures (>15min).
The GM2000 HPS II COMBI is controlled with exactly the same control-box and hand-controller as the GM1000HPS. For details, see below. For firmware updates and updates on comets, satellites, as well as earth rotation data, a small piece of (Windows only) software is provided by 10Micron. In this blog post there is more detailed info on how this works.
Altitude adjustment
There is one adjustment knob for altitude adjustment and two knobs on each side to keep altitude in place. The mount can be used at locations within latitudes 20° - 70°. There are multiple attachment points for the altitude adjustment mechanism. Depending on the desired latititude, orientation of that mechanism has to be changed
COMBI
The ‘COMBI’ in the name indicates that the mount can be taken apart into two pieces. The DEC axis on top and the RA axis with mounting mechanism at the bottom. A multi-pole connector in the mount ensures full electrical connectivity between both parts of the mount. Unfortunately it does not support through-the-mount cabling.
Balancing.
A 40mm wide counterweight shaft is screwed into the top part of the mount. It supports the use of either 6kg or 12kg counterweights. The software in the mount has an auto balancing routine for both axes. With some close attention and a bit of time, it is well possible to balance the scope within 0.0% accuracy.
10Micron GM1000 HPS

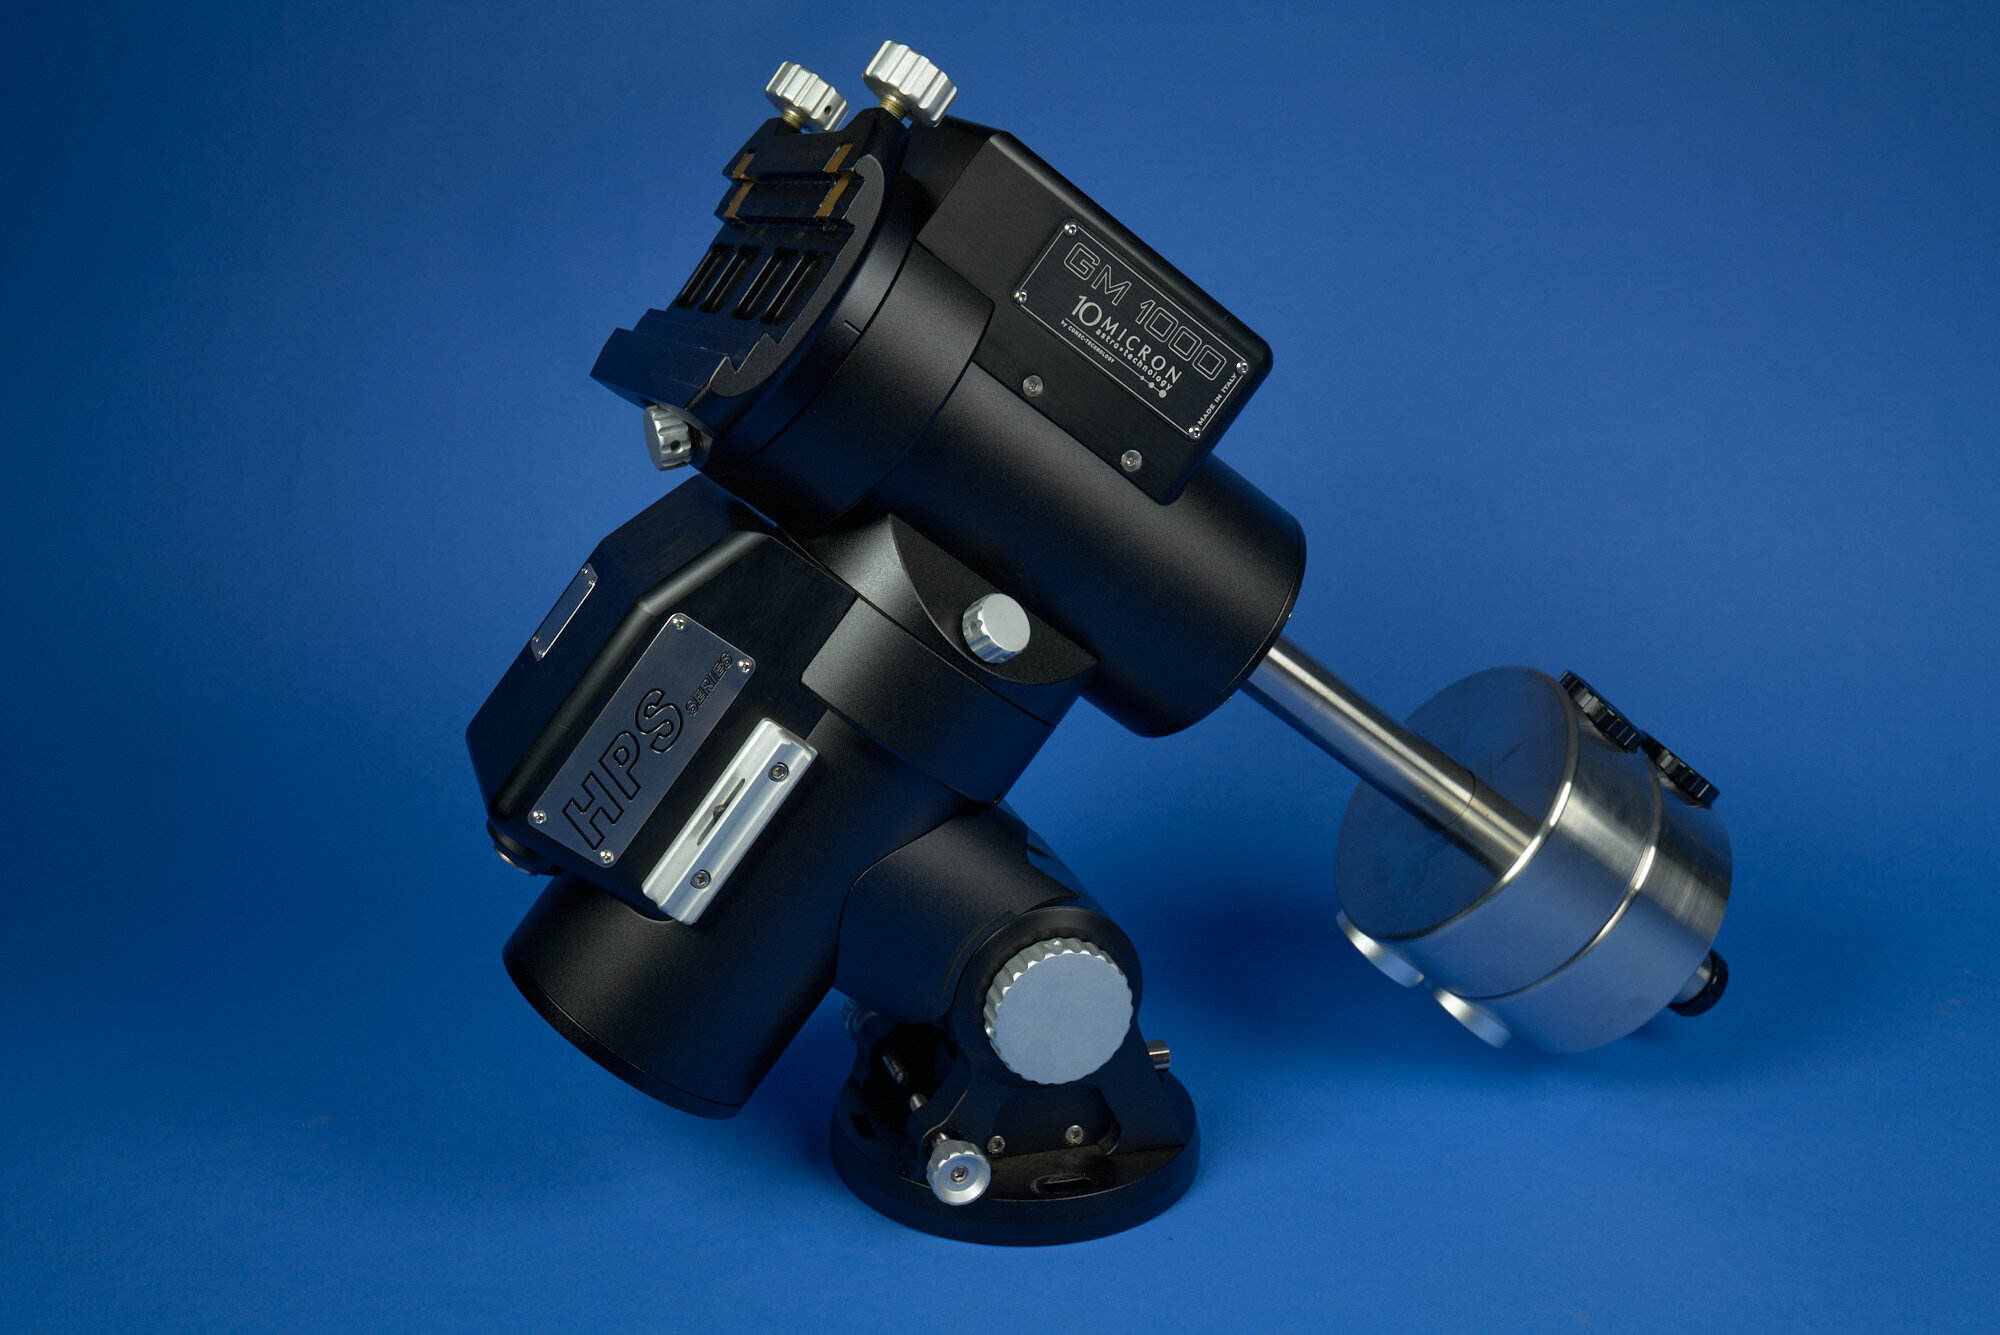


The GM1000HPS is the smaller brother of the GM2000HPS mount. Its weight is about 20kg and maximum load capacity is 25kg. Also the GM1000HPS is equipped with absolute encoders. By no means is this a portable mount, but at a weight of 20kg this mount can be transported rather well. Add to that the ability of unguided imaging, and effectively this mount is up and running almost as fast as a true mobile mount, like the RainbowAstro RST-135E mentioned below.
Important is to level the mount well and point as close to the north as possible with a regular compass. Using MountWizzard4 a quick 3-point model can be built in about a minute. The software will give quantitative information on how many fractions of a turn both the azimuth or altitude adjustment knobs need to be turned. Then running a second automated 3-point model will likely give a fairly good result. Any polar alignment error < 5 arcmin is considered acceptable. Once within that limit, running a final 18 point model will give enough precision for a mobile setup with focal lengths up to 1000mm to run unguided.
The mount runs on 24V DC power and is controlled via a separate control-box that houses a Linux-based computer. The control-box can be controlled using either the hand controller or a PC. Connection with the PC can be established using either WiFi, Ethernet or RS-232/USB.
Azimuth adjustment
Adjustment of the azimuth during polar alignment is done by pressing adjustment screws against a block on the GM1000HPS-specific mounting plate that is mounted on the tripod. During polar alignment, the handset will show the required amount of rotation for each screw in degrees.
Altitude Adjustment
The altitude screw allows for fine adjustment of the altitude. For larger adjustments, the side-knobs need loosening. For smaller adjustment they can stay tight. A large adjustment knob can be attached, but this may lead to accidental adjustment when putting the mount in the case. Adjusting using a hex screwdriver works well.
Counterweights
The mount does not come standard with weights, only a weight-bar. Weights are selected based on the scope used. 10Micron offers 3kg and 6kg weights. Two 6 kg weights appear to be just fine to provide enough counter-weight to each of the Takahashi scopes. Sliding them further in or out compensates for the difference in weight between the scopes.
Control-box
With the mount comes a separate control-box. It is essentially a small linux-based computer that manages all functions of the mount. The control-box can be accessed through an ethernet-cable or WiFi for remote control. Local control works through a hand pad. Don’t expect too great of a user experience from a four-line display, but it works well.
MBox
Having access to exact location and time information is crucial for proper unguided tracking. There are different ways to achieve this. It can be downloaded from the acquisition computer, or it can be entered via the handpad. Alternatively, an MGBox V2 can be connected to the control box. It automatically syncs location, time and weather info to the mount. A ‘set and forget’ option. Make sure that for location date/time info in acquisition software ‘read from mount’ is selected.
Power Supply
The mount comes standard with a 110/220V AC adapter brick. It feeds the mount with 24V DC power supply using a pretty solid ‘screw-on’ connector. If the mount is also used in the field, 10Micron offers a mobile power supply adapter. It converts 12V DC to 24V DC. Even if you use a battery pack in the field that provides 110/220V, using the mobile adapter is the better choice. It uses much less energy than the 110/220V adapter.
Rainbow Astro RST-135E
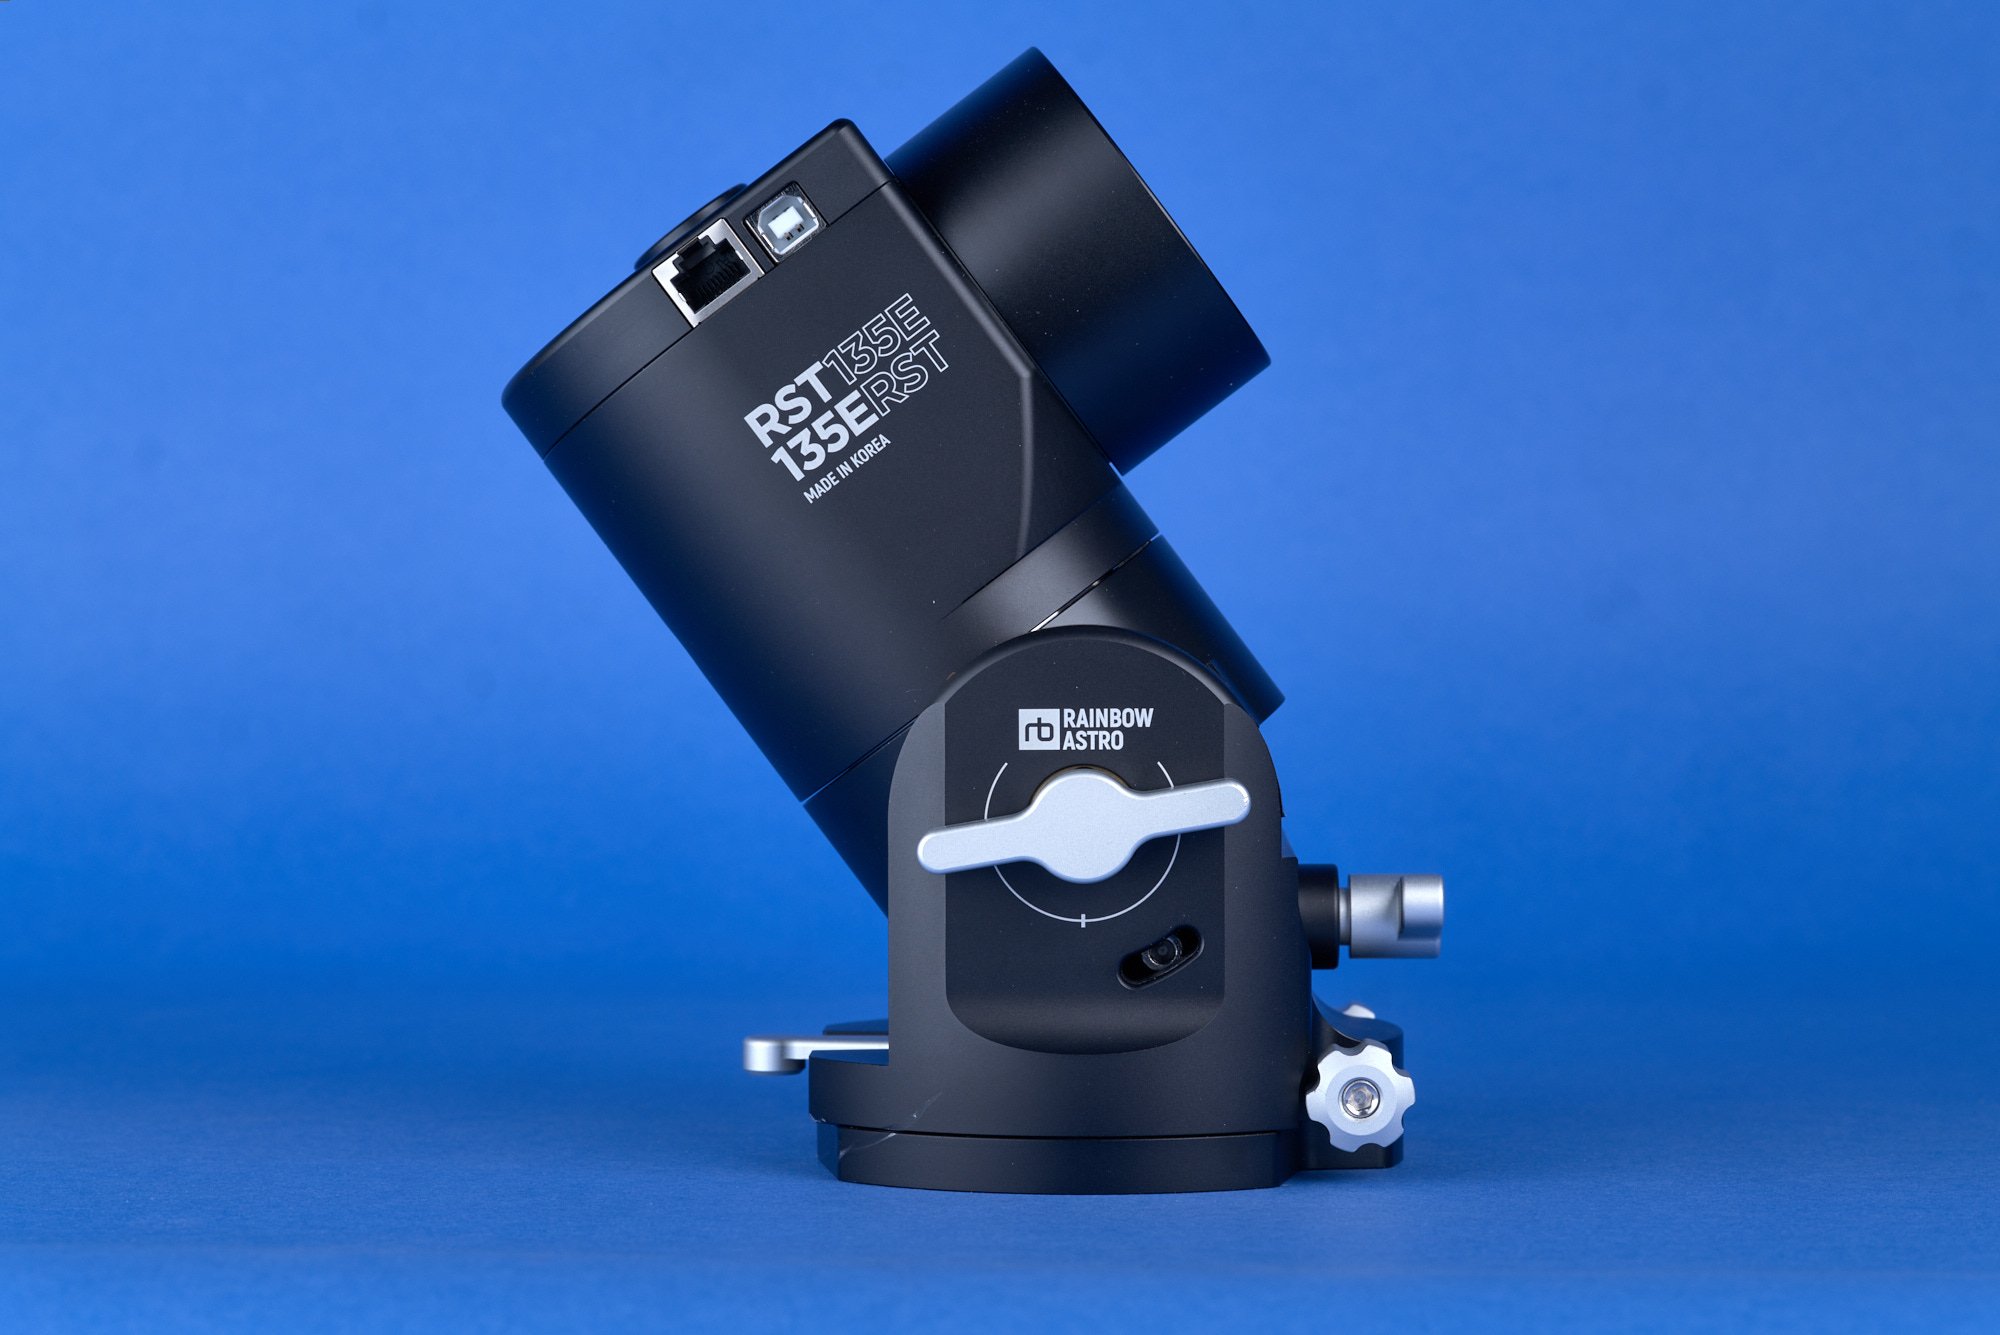


Rainbow Astro is a Korean company that has its origins in robotic engineering. They produce a line of telescope-mounts using strain wave gear or harmonic drive motors. These motors are known to combine a lot of torque in a small package, are very precise in their movement and have almost no backlash, ideal properties for an astronomical mount. In the case of the RST-135E, the mount weighs only 3.4 kg, but can hold a 13.5kg rig unbalanced or 18kg balanced. The Rainbow Astro was one of the first to bring out such mounts, but today there are several competing products on the market, including the NYX-101 from Pegasus Astro and the AM-5 from ZWO.
The RST-135E is a relatively new version of the mount, and includes an encoder on the RA axis for better tracking performance. In contrast to the GM1000HPS, this mount can not be used unguided. The precision is not good enough for that, and also an encoder on the DEC axis is missing. Pointing accuracy is very good. After a polar alignment, syncing just one blind plate-solve is often enough to put any selected target right in the middle of the field of view. There is a native INDI driver for the mount, so it can be fully controlled through KStars/Ekos.
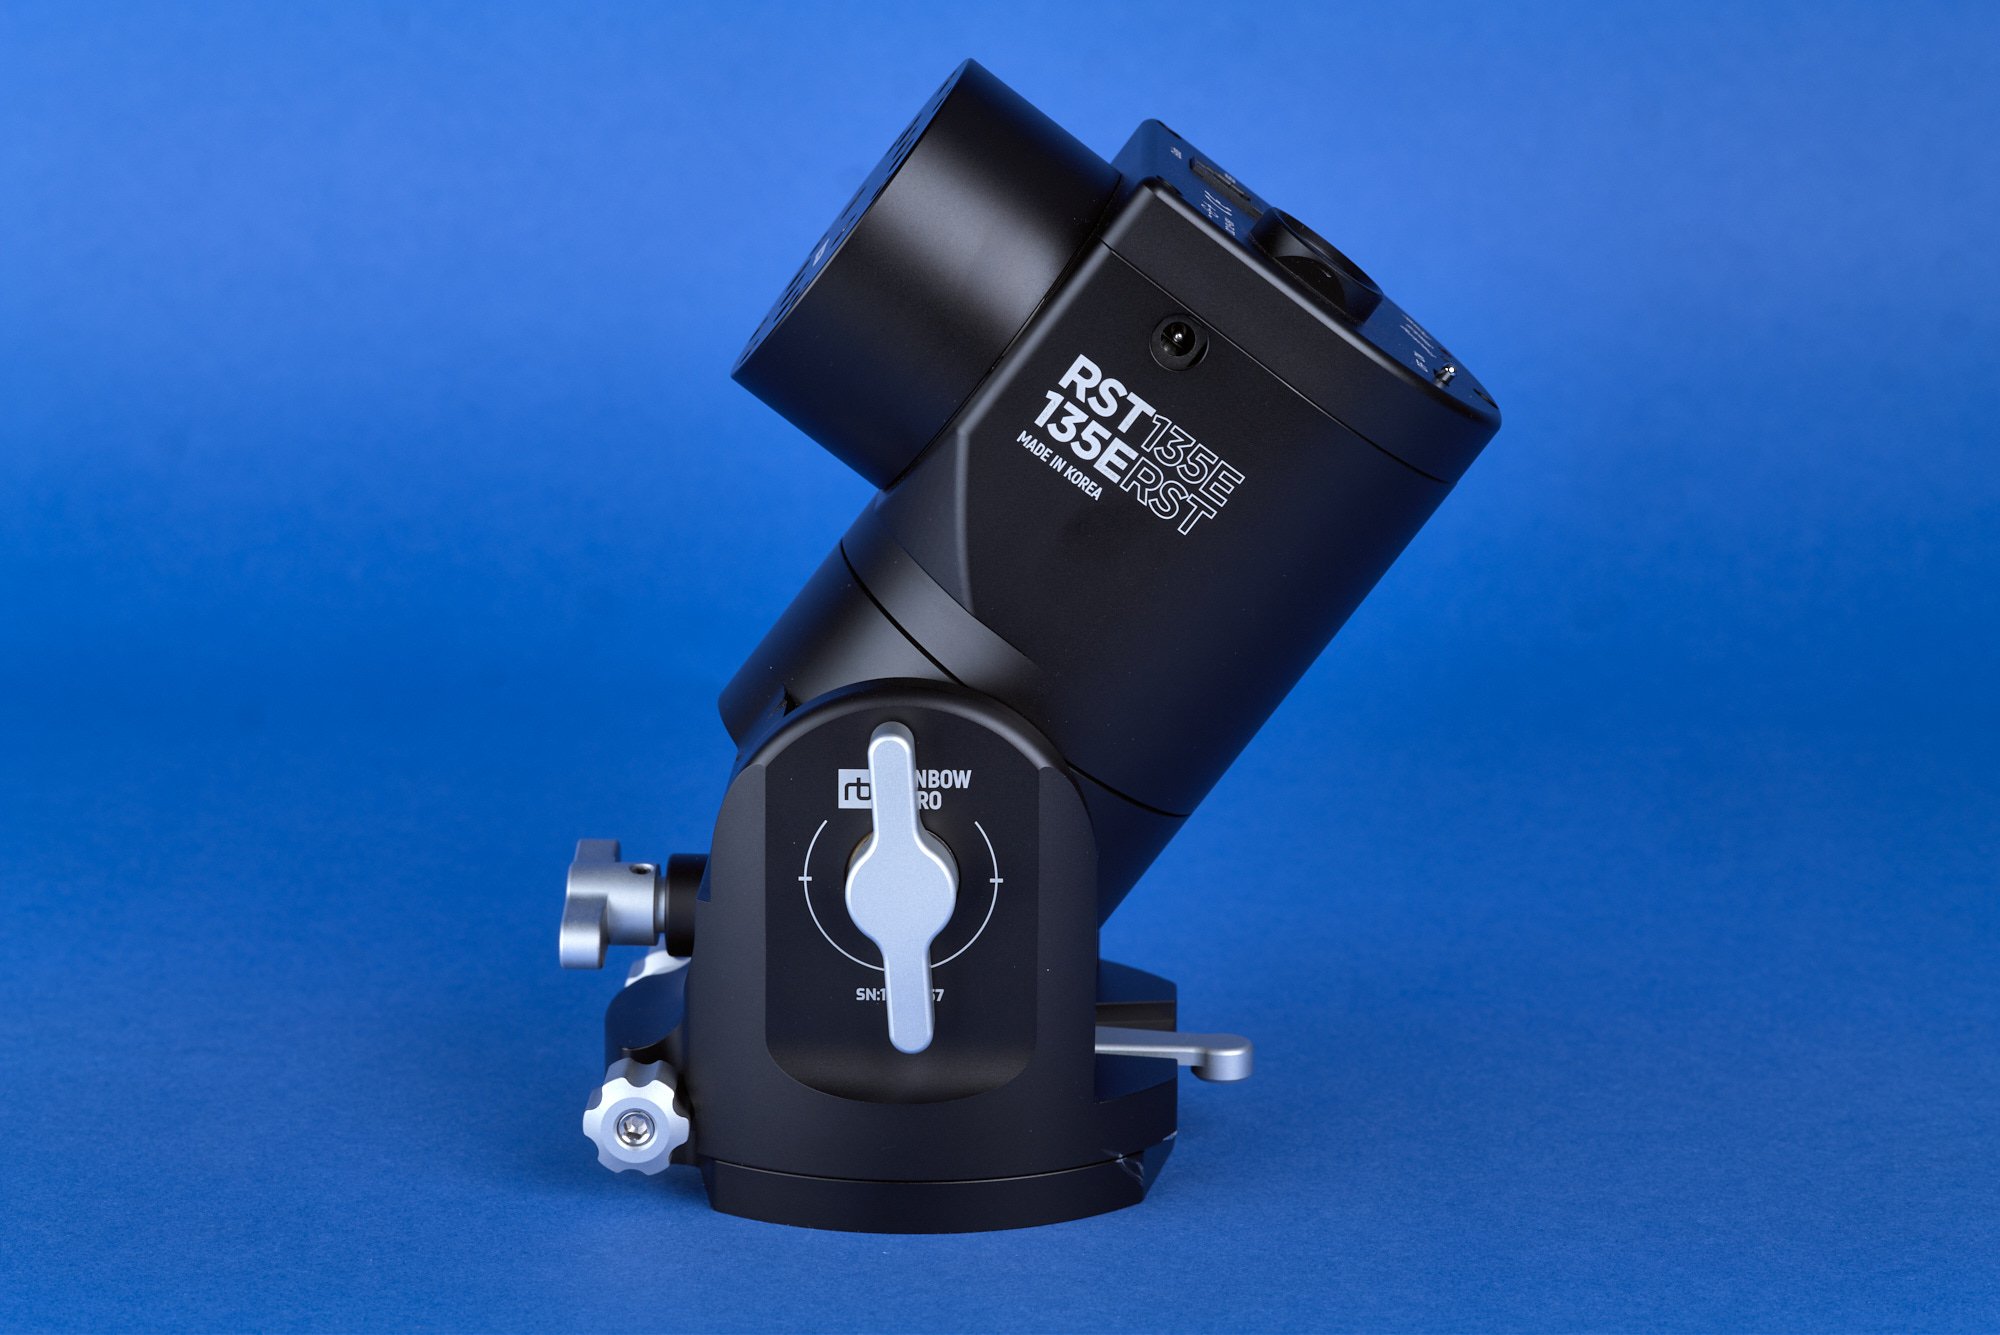
The claim to fame of this mount is its portability. One can carry it in a backpack and set it up in minutes. Portability and versatility are the two main reasons why this mount was added to the observatory. It allows the setup of a second rig without too much hassle, and can be used with the FSQ-106 or the Mewlon-180c. Alternatively it can be taken as the main rig with one of these scopes to a remote dark-site, to capture a faint nebula or a planet that is low on the horizon. Also lucky imaging applications, such as solar, lunar and planetary imaging, work well this mount. The mount can even be used as a tracker for photography with regular mirrorless cameras and their lenses. The Perseid meteor shower for example was photographed using this mount. It combines a lot of use-cases which make it a very versatile addition to the observatory.
Hand Controller
The hand controller (HUBO-I) plugs in through an ethernet-cable. The menu-system is not very intuitive, but with a bit of practise you can find all relevant options. The most important function is the homing function, a long press on “0". With this function the mount calibrates its position and parks the mount in a fixed home position. Each time when turning off/on the mount, this homing needs to be done, otherwise the mount can show some weird behaviour and erratic movements.
LosmandySaddle
The saddle is screwed on the mount using M8 bolts, spaced 35mm apart. This is not a very common connection, and most standard Losmandy/Vixon saddles cannot be used. ADM has a saddle that fits, but it is rather large and can crash into the mount in extreme positions. An alternative is this one, shown in the picture above. It has a solid build, and keeps the setup nice and compact.
Counterweights
A counterweight is not strictly necessary for most setups. The motors can easily carry serious loads. However, when the whole system hangs on one side of the tripod, there is the (perceived) risk of the tripod tipping over. And as the center of gravity is constantly changing, flexure in any part of the setup will lead to worse tracking performance. So when a regular rig is mounted, it is good practise to roughly balance over the DEC axis and add the separately sold counterweight to get more balance on the RA axis.
Vixen saddle
If size and weight is critical, and the telescope can be mounted using a Vixen saddle, it is hard to beat the standard Rainbow Astro saddle. One main knob to hold the telescope and a smaller knob to further secure the base-plate.
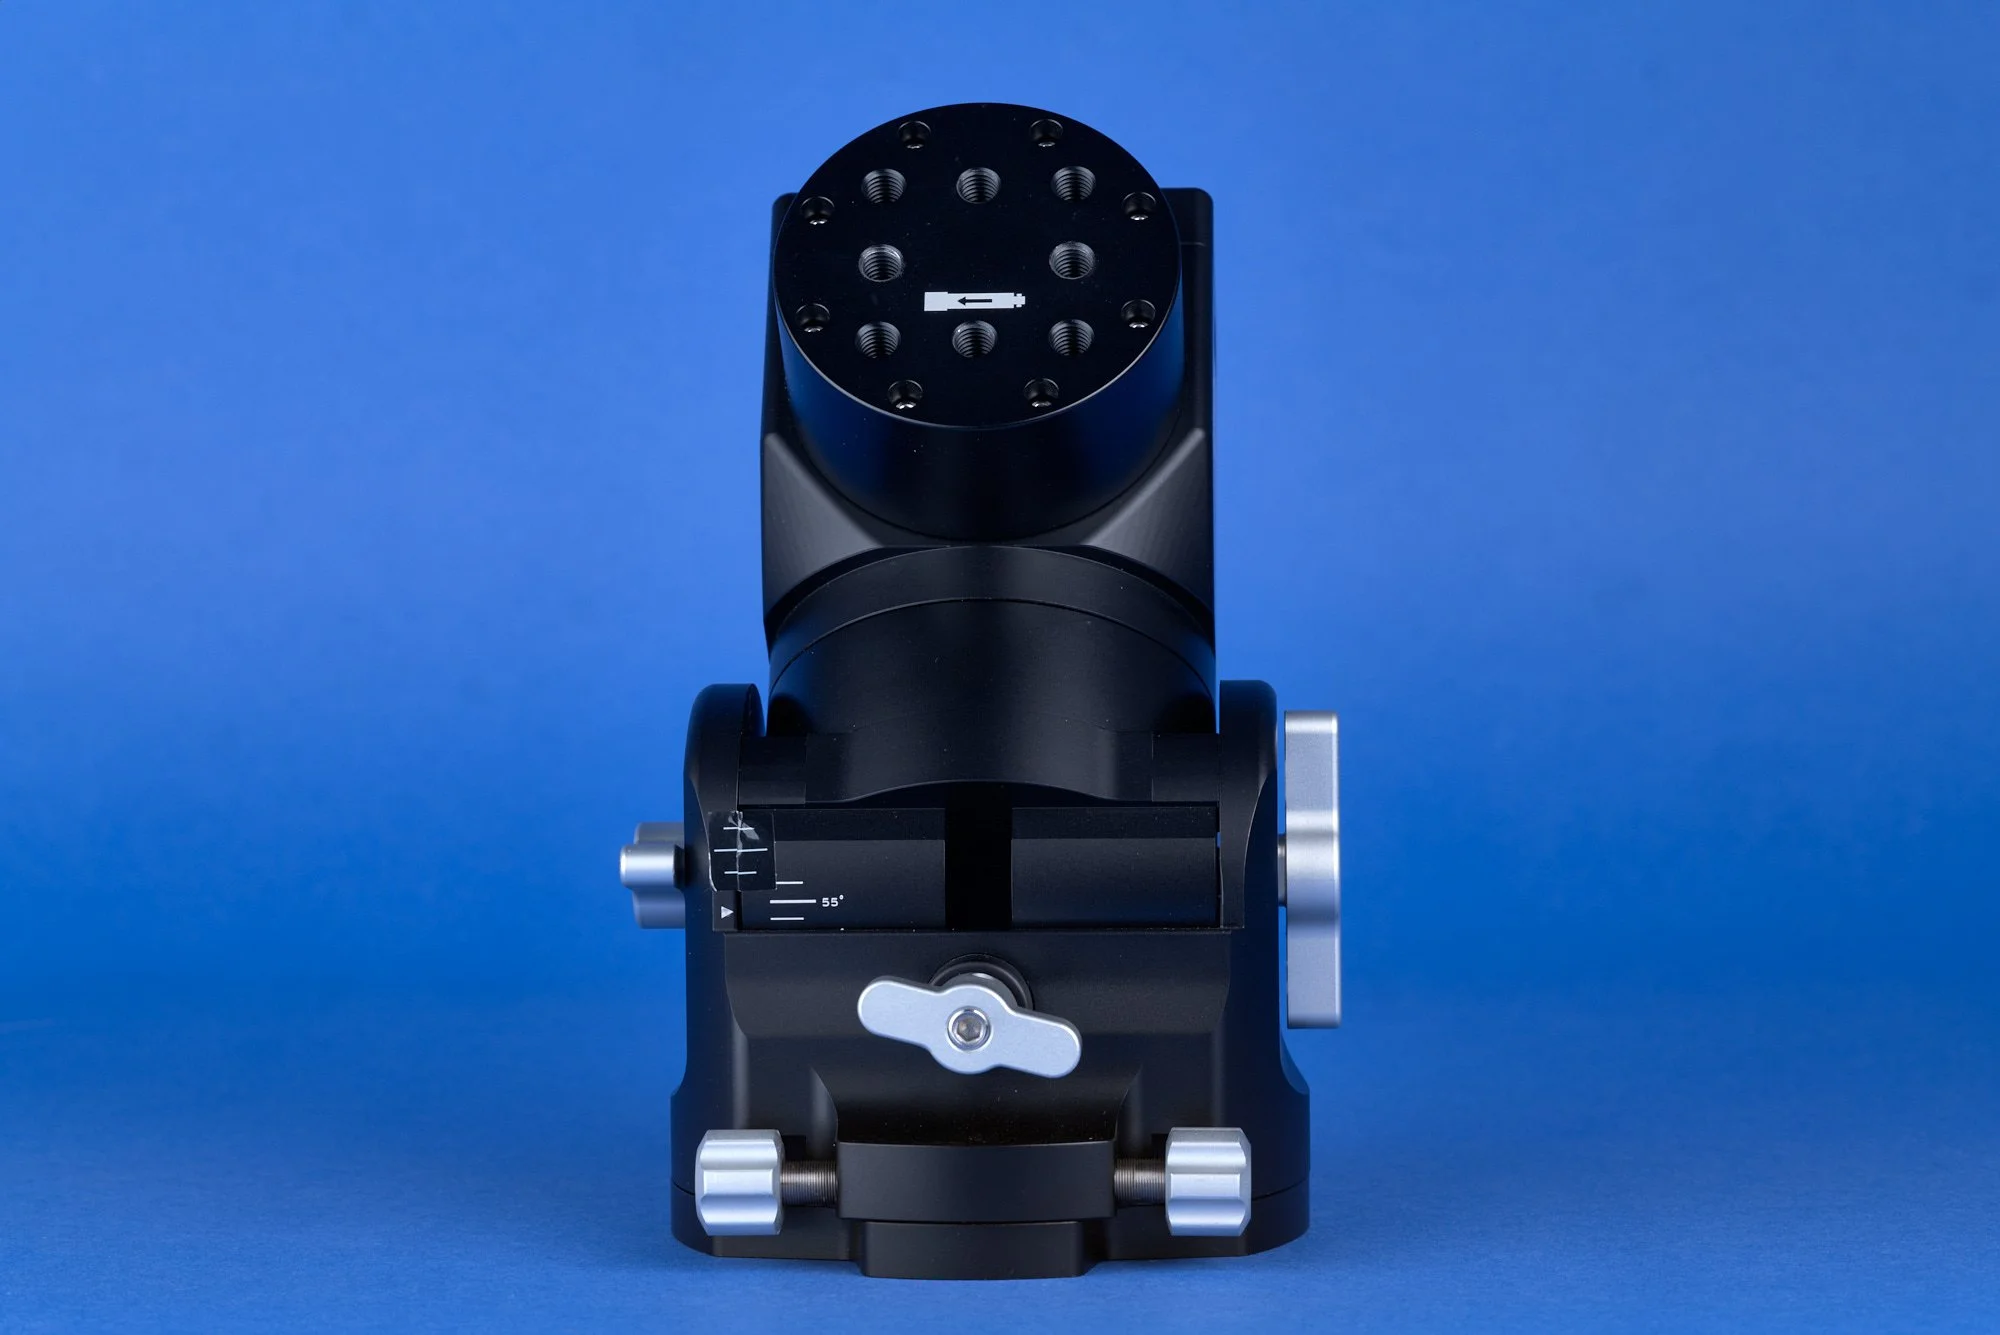
Altitude setting
The scale on the altitude setting is not very precise. To speed up polar alignment, an extra marker has been added to the mount specifying the correct altitude setting for the location of the observatory. Polar alignment remains necessary, but using this little help makes for a good initial starting point.
Arca Swiss saddle
When using the mount in combination with a regular photo camera, a typical connection plate is of the Arca Swiss type. ADM has an Arca Swiss type saddle that can be screwed onto this mount. On the mounting plate there is a total of eight holes, so the saddle can also be placed perpendicular to the regular telescope pointing position. Depending on the camera/lens connection this may be important.