Total Solar Eclipse 2026 - closeup images
The corona of the fully eclipsed sun, with a massive solar flare visible on the left-hand side.
Partially eclipsed sun, about halfway totality.
The beautiful diamond ring flares up just seconds before totality sets in
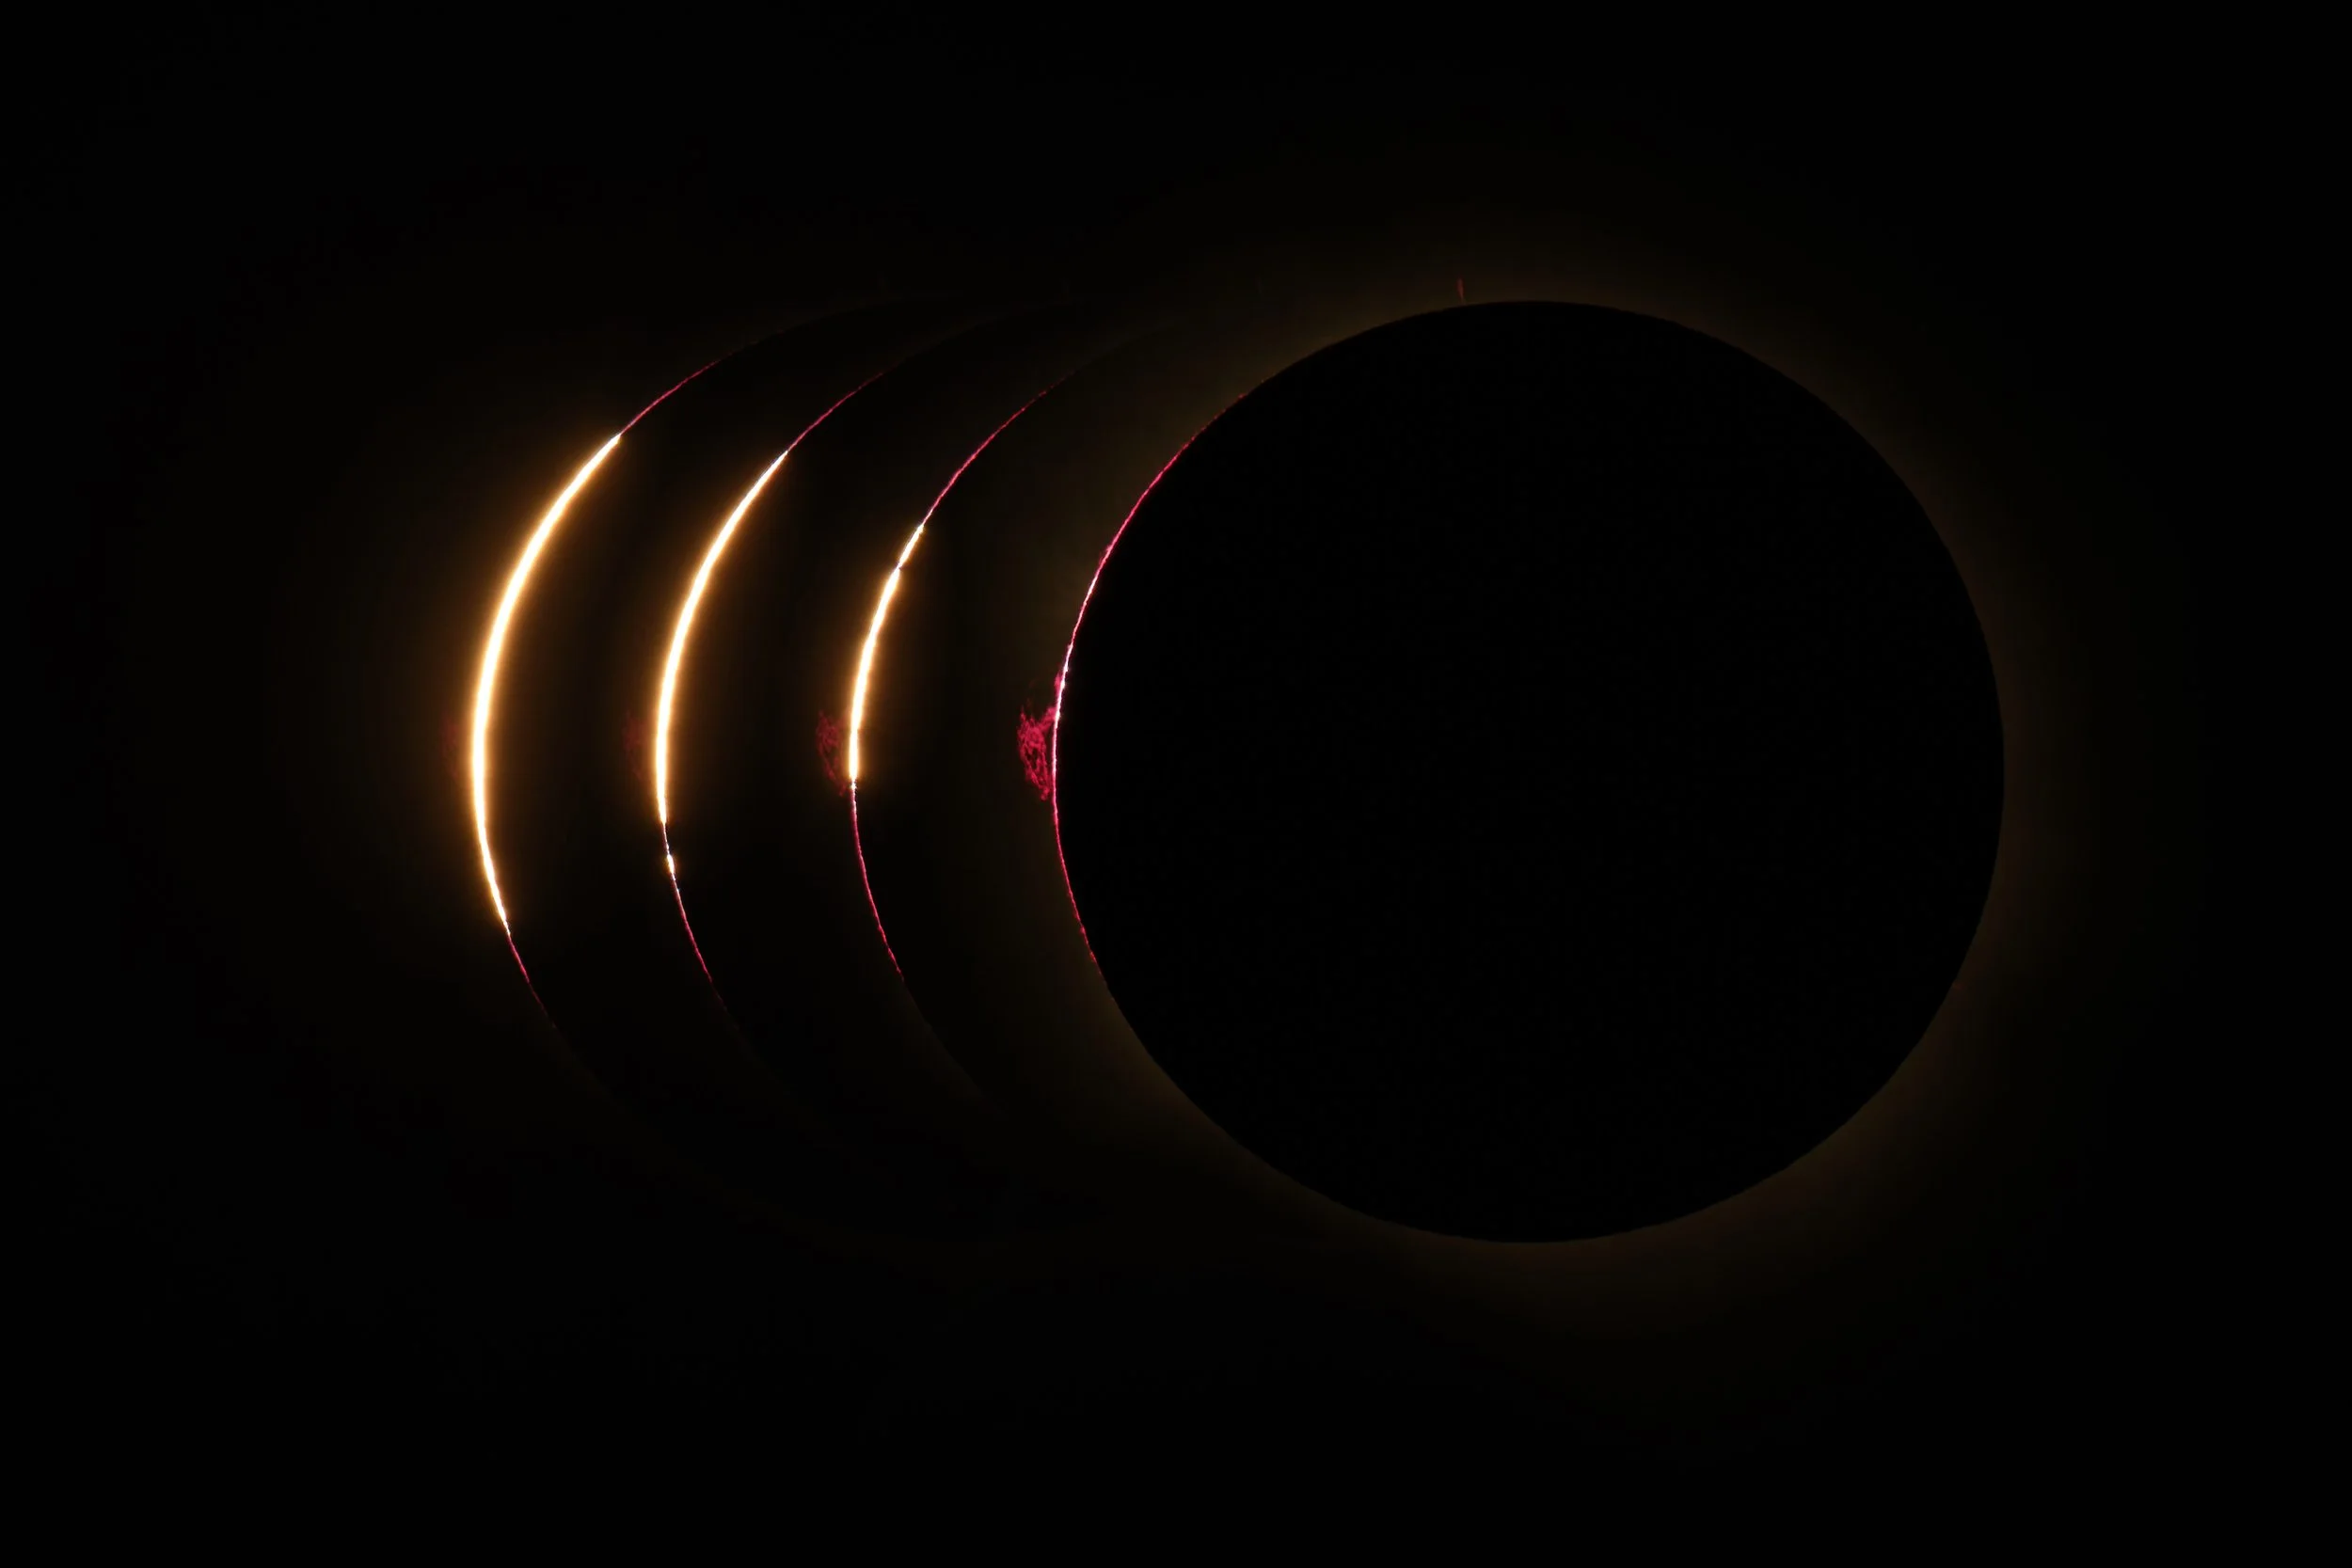
Composition covering a timespan of 12s in which the Baily’s beads show up as crater by crater the moon shifts in front of the sun.
Partially eclipsed sun ‘slides’ off the mountain before sunset.
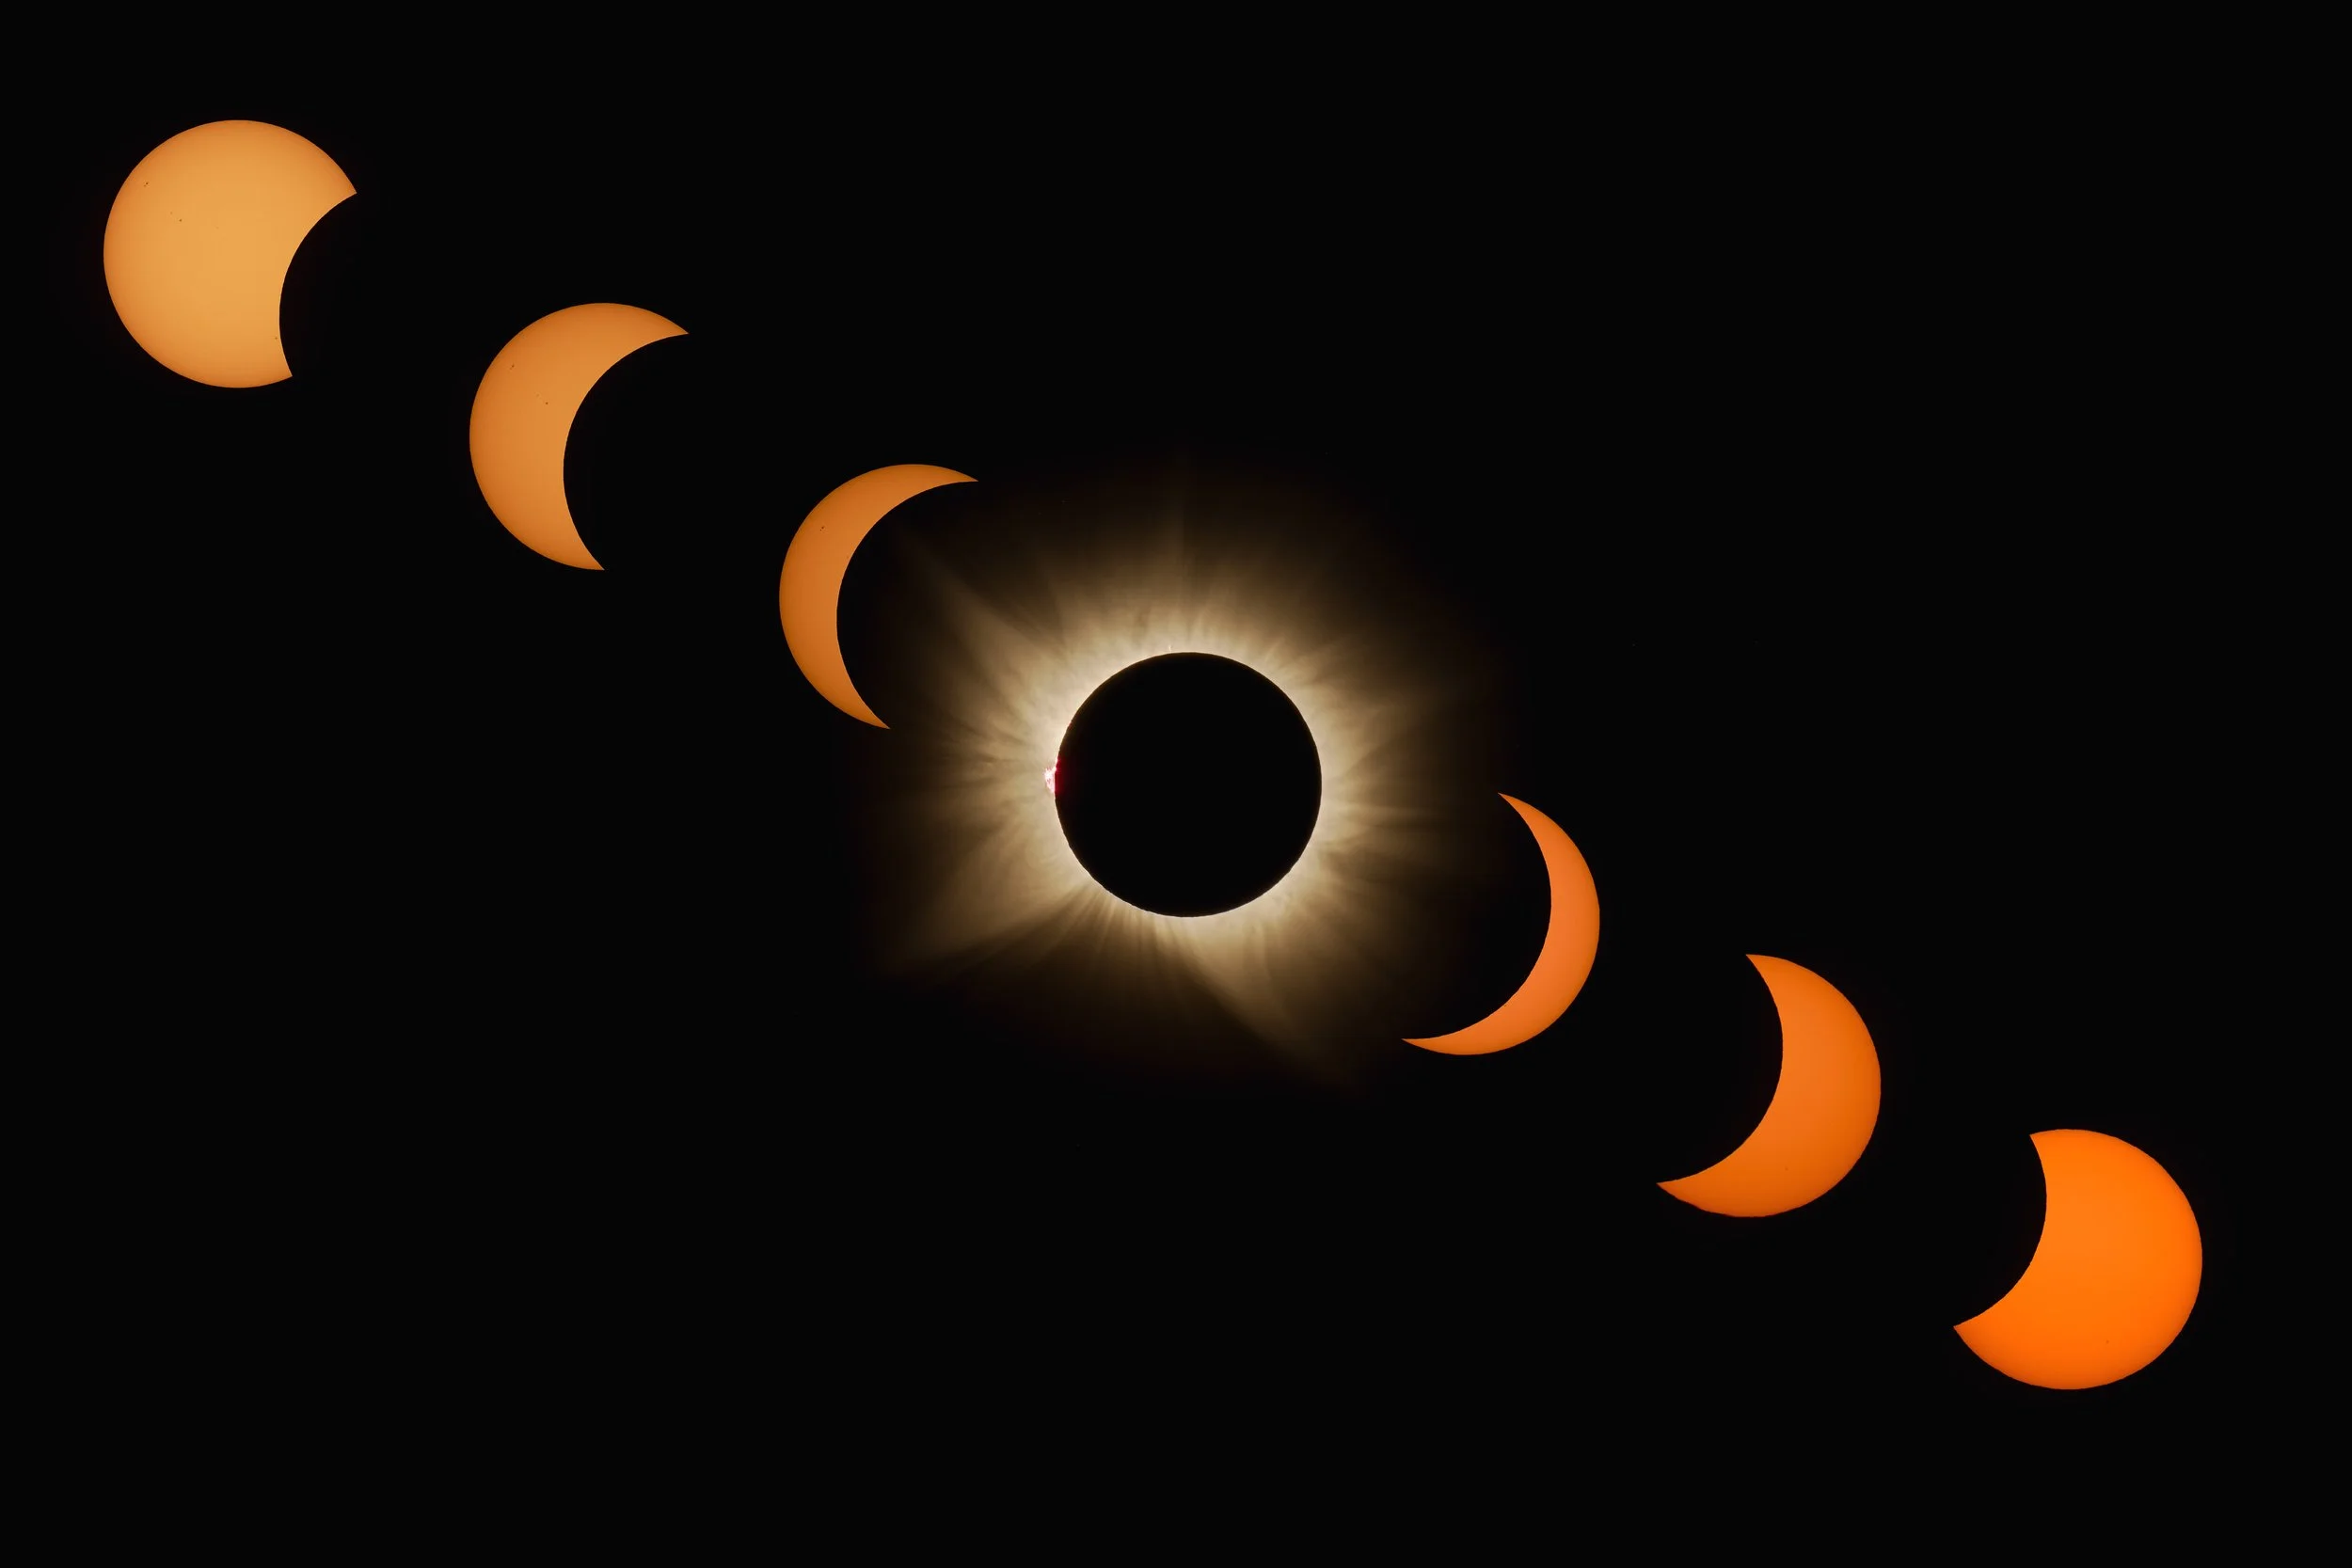
Composite of 6 partial eclipse images and the corona image.
Introduction
On 12 August 2026, a total solar eclipse was visible from Europe, with most ideal locations across the north of Spain. We travelled to the Spanish mountains in the north-west of Spain to photograph this event. You can find a full description of the preparation, tools, planning, travel, as well as a detailed account of events during the actual eclipse in the blog on this website entitled ‘Total Solar Eclipse 2026 - The Journey’. The current page shows details on photographing and processing the closeup shots. The wide-field shots you can find here.
Location and conditions
One of the unique properties of this eclipse was the low altitude. Totality would happen only an hour before sunset. This provided an opportunity to plan for a closeup image showing a partially eclipsed sun sink into the mountains. As we did our recce mission the day before we found a beautiful spot just a bit up the hill with a beautiful view of the mountains towards the West, with a lovely lake in front of it. Peakfinder helped us to understand which of the mountain peaks the sun would disappear behind and made us fine-tune our exact location. The sloping terrain was not very easy to work from, but it turned out to be a fairly quiet place, so we could concentrate on making sure that equipment was safe and well.
During most of the day small clouds passed by over the area. Certainly not enough to abandon plans and invoke plan B. But still enough to potentially be in the way for some of the shots. Towards the end of the day some of the clouds cleared up, and others were so scattered and low on the horizon that none of the closeup images has been effected by clouds, other than at the very last moment when the sun set down.
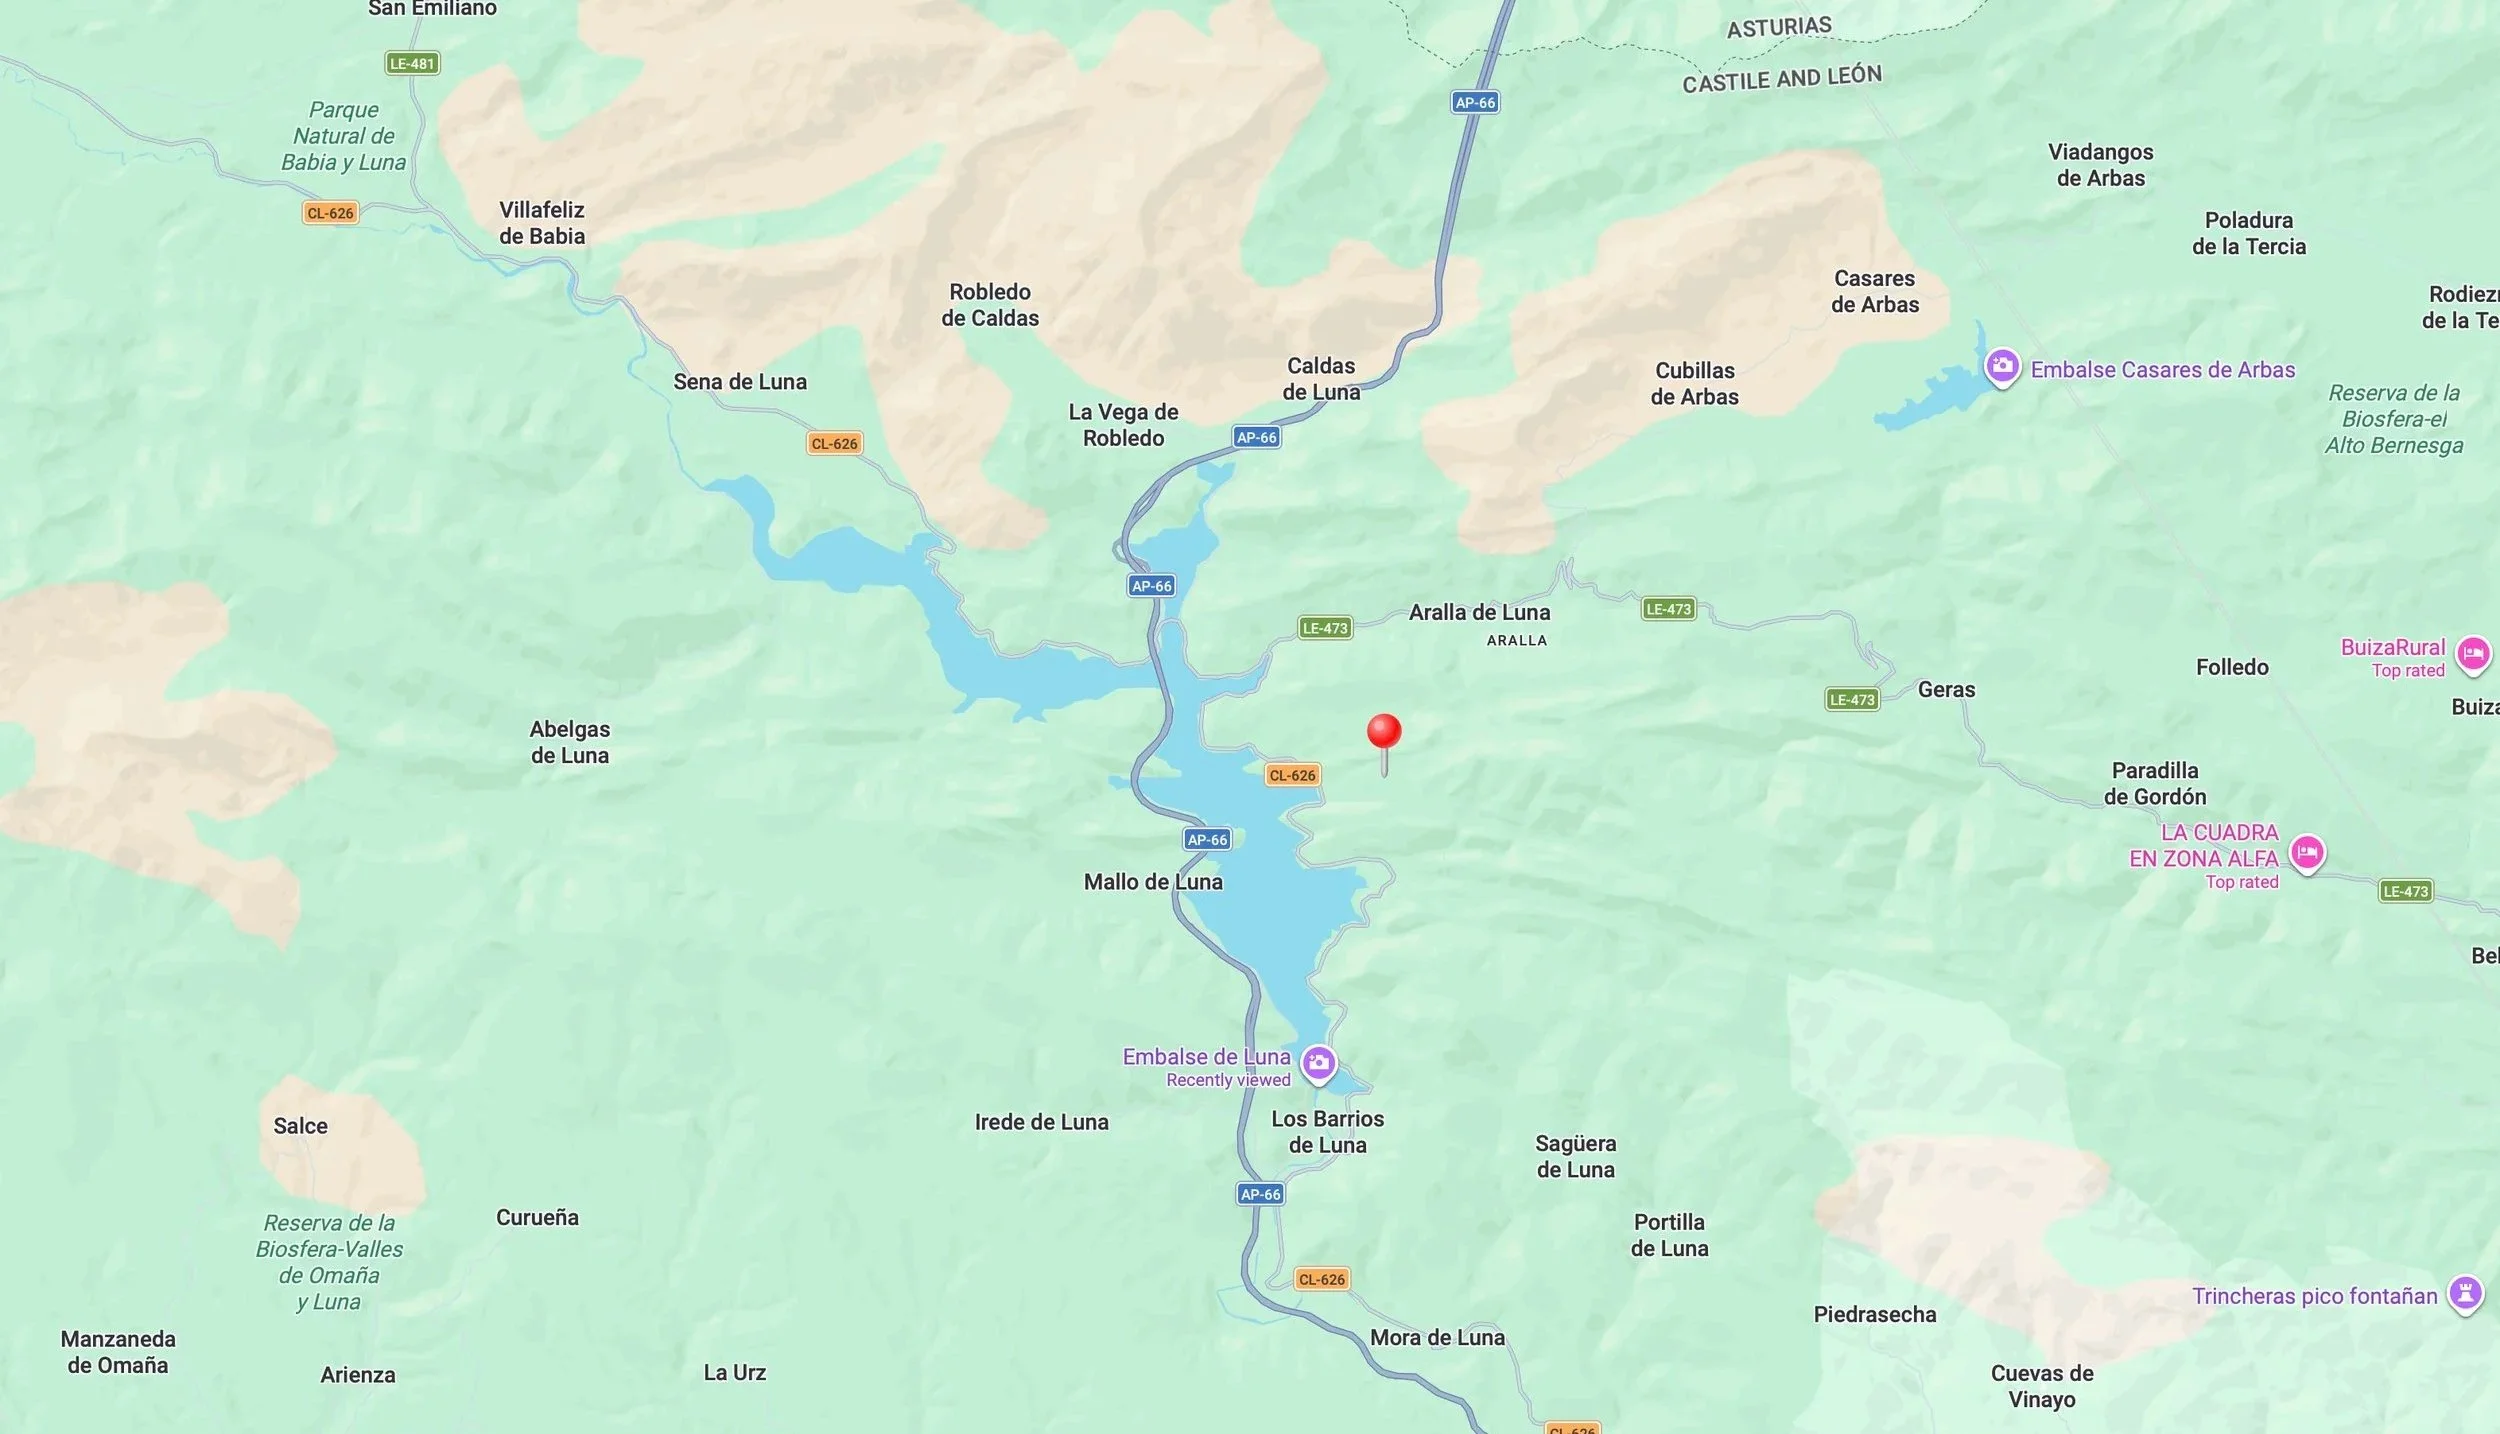
The location from where images were taken was at Los Barrios de Luna, a lake in the Cantabrian mountains, just a few hundred meters up on the hills near an abandoned mercury mine (42.88355°N 5.85951°W).
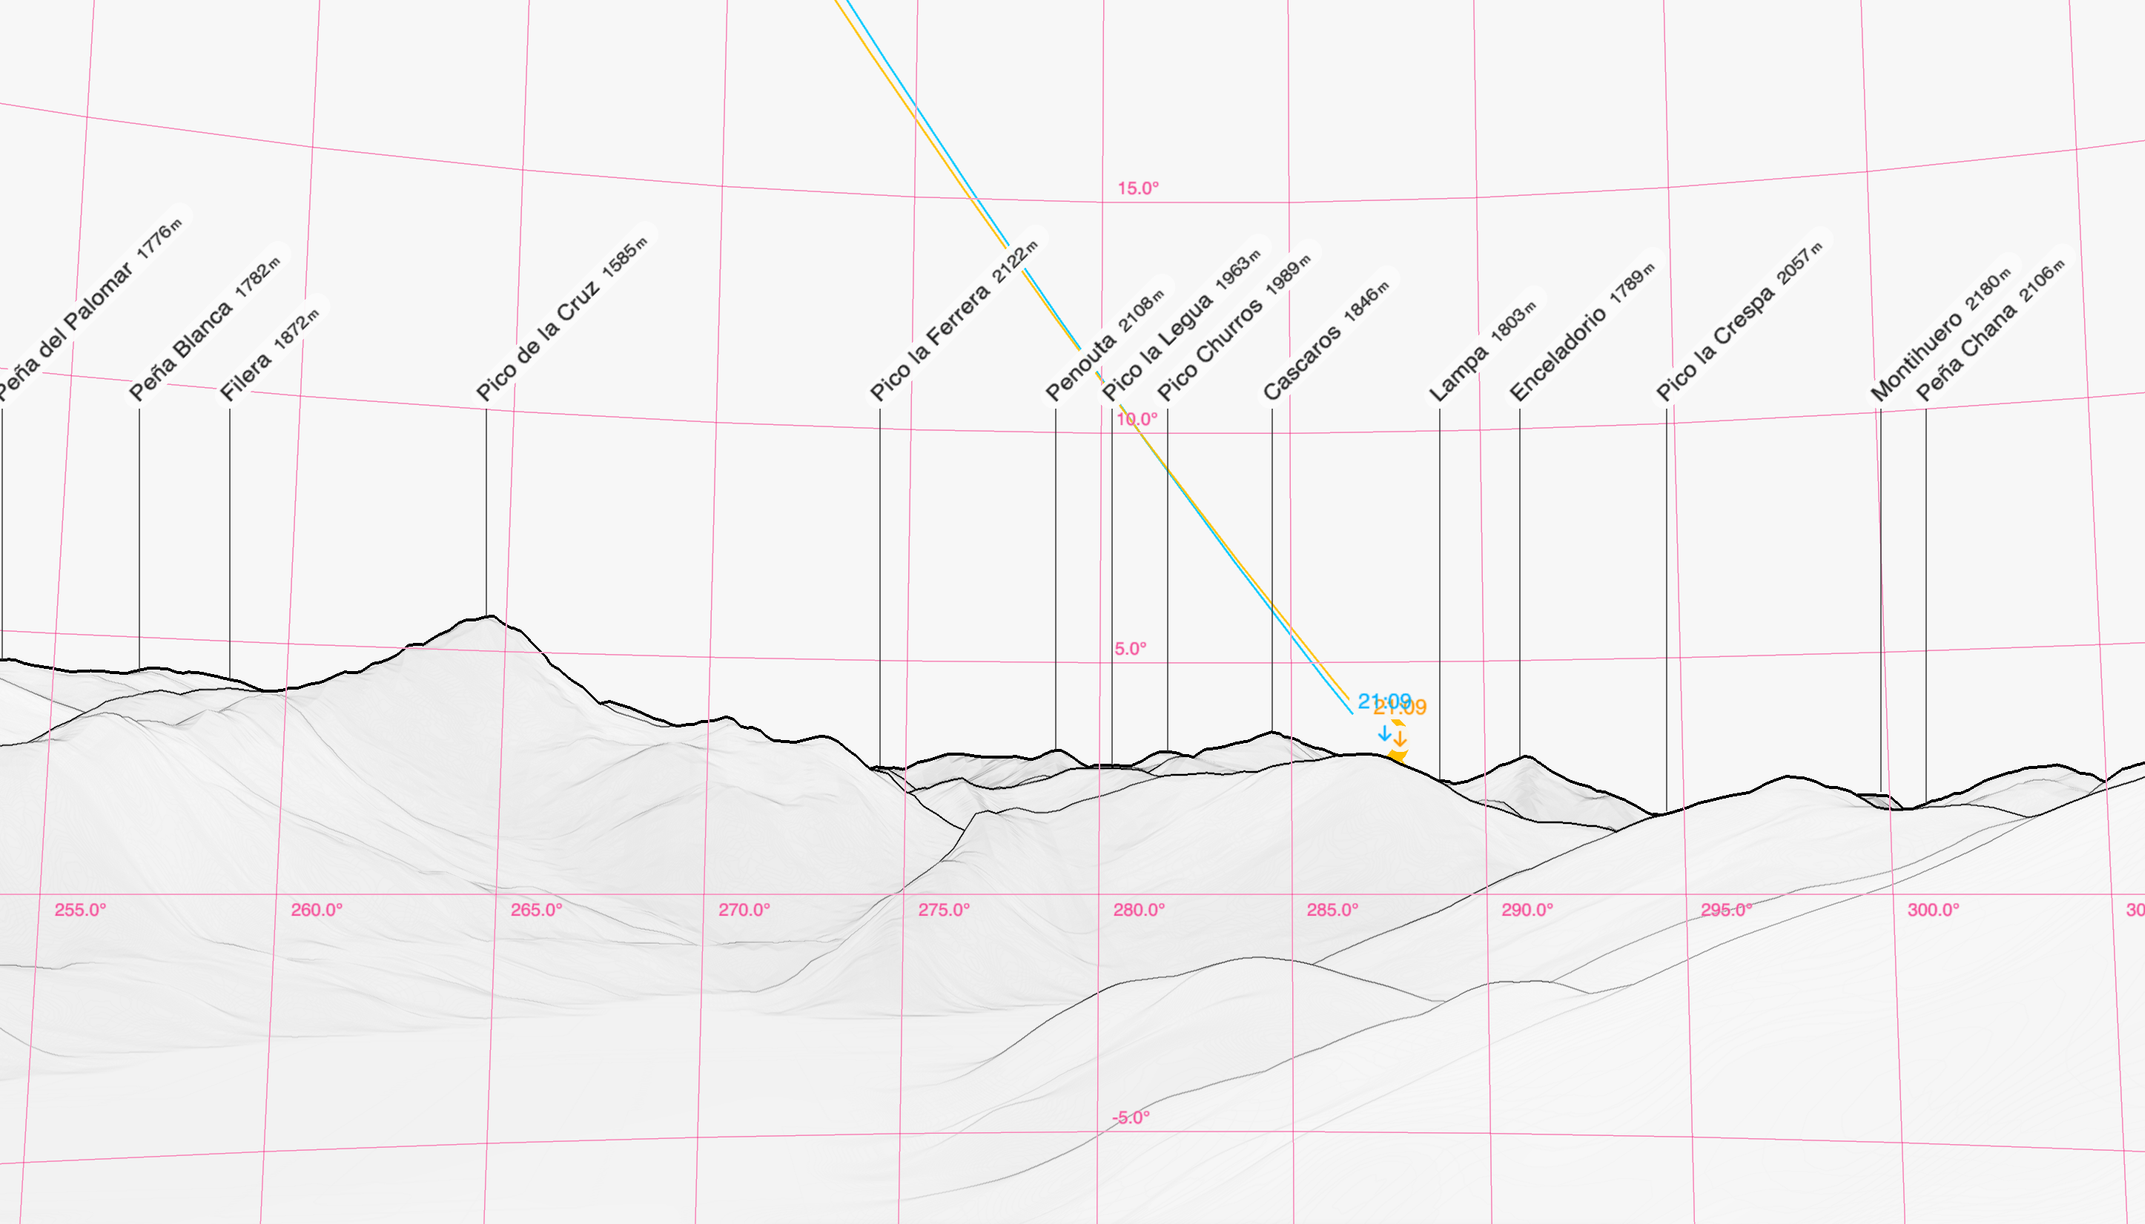
Peakfinder provided a pretty exact overview of the horizon for our location, showing where the sun would set on the day of the eclipse.
Equipment
The rig consisted of a Fujifilm GFX100 II with Fujifilm GF500mm f/5.6 telelens. To get a bit more reach, the Fujifilm GF 1.4x extender was used as well, creating a total focal length of 700mm. The rig was placed on a RainbowAstro RST-135E mount for continuous tracking throughout the eclipse. Daytime polar alignment is not very precise, but only two small re-adjustments were needed throughout the whole event. Solar filter used was the ASSF filter from Baader Planetarium, with has an optical density of OD5.1, leaving only 1/125,000th of the light through.
Telescope/Lens
Mount
Camera
Filters
Guiding
Accessoires
Software
Fujifilm GF 500mm f/5.6 R LM OIS WR
RainbowAstro RST-135E on Gitzo 3-series systematic tripod
Fujifilm GFX100 II
Baader AstroSolar® Spektiv Filter OD 5.1 – ClearWhite (100mm)
Unguided
Fujifilm remote cable release and Ugreen 95Wh Powerbank
Capture One Pro 16.8.5.30, Photoshop 27.9.1
Imaging
During the partiality phases, images were taken every 30s, using the built-in intervalometer. About 20s before totally the filter was taken off and brackets of 9 shots were continuously triggered using a remote cable release. During totality the same bracketed shots were taken, but now with a base exposure of 1/15s, resulting in exposures up to 1s. During the final phase exposure times were step-wise increased to finally 1/10s.
11648 × 8736 px (100 MP)
700 mm @ f/8 (560mm full frame equivalent)
3.6° x 2.7°
1/500s, f/8, ISO100
Bracketed (9×1 stops @1/500s) - 1/8000s-1/30s
Bracketed (9×1 stops @1/15s) - 1/250s-1s
Resolution
Focal length
Field of View
Exposure partiality
Exposure totality
Processing
The first step in the processing was the color correction of the images in Capture One Pro. The Baader solar filters are great, but the images come out as almost black and white. For this purpose, white balance was set to 12,500 and tint was slightly reduced. Color correction was applied for all images in the same way. Therefore images later during the eclipse show up much more orange/red, due to the low altitude of the sun.
Some images were direct exports from Capture One. Some images were composited from several other images. This is obvious for the image of the Daily’s beads and the composite image of the whole eclipse. The diamond ring is also a composite of a single diamond ring photo and the corona image, to emphasise the corona a bit more. Also the sunset image consists of the solar image overlapped with a longer exposed background image taken after sunset.
Corona image
The corona image was by far the most challenging from a processing point of view. Two objectives were targeted at the same time. The first one was to combine multiple exposures into an HDR blend, to bring out detail in the fainter outer areas of the corona, while still maintaining enough detail in the much brighter central part. The second was to bring out the filament structure that can be so typical of corona images. The way it was done was taken from Nick Carver at Nebula photos. He does a much better job in explaining than I can, so please check out his YouTube video on this method.
The full set of steps is described in the workflow below. At the heart of the method are two stages. The first is to align the various exposures (in my case 1/250s through to 1s) and take the mean value. The second stage is to bring out detail by subtracting a blurred image from the original, leaving over the detail and blend that detail back into the original several times using overlay and/or soft light blend modes. In a quest for even better methods, I used all sorts of different approaches. This included HDR functionality in Photoshop, Affinity, PixInsight and even the specific HDR tool Photomatix. It included the use of high-pass filters, again in both Photoshop and Affinity. It included alternative alignement tools such as FFTRegistration in PixInsight. And all of that in various combinations. But at the end of the day I decided that the outcome of the original method was still the best, so that is the one that is presented here.
David Cruz recently published a corona image on Astrobin with a lot more detail. He had written his own software to get to that result. On my question on availability, he mentioned that this software will be made available for a wider community. So if it does, my plan is to use that to revisit this image and see if even more detail can be retrieved.