
Caldwell 8
NGC 559, Ghost’s Goblet
45’ x 29’ | 0.3”/px | 9142 × 5884 px | full resolution
Cassiopeia
RA 1h 29m 34s Dec +63° 17’ 59” | 0°
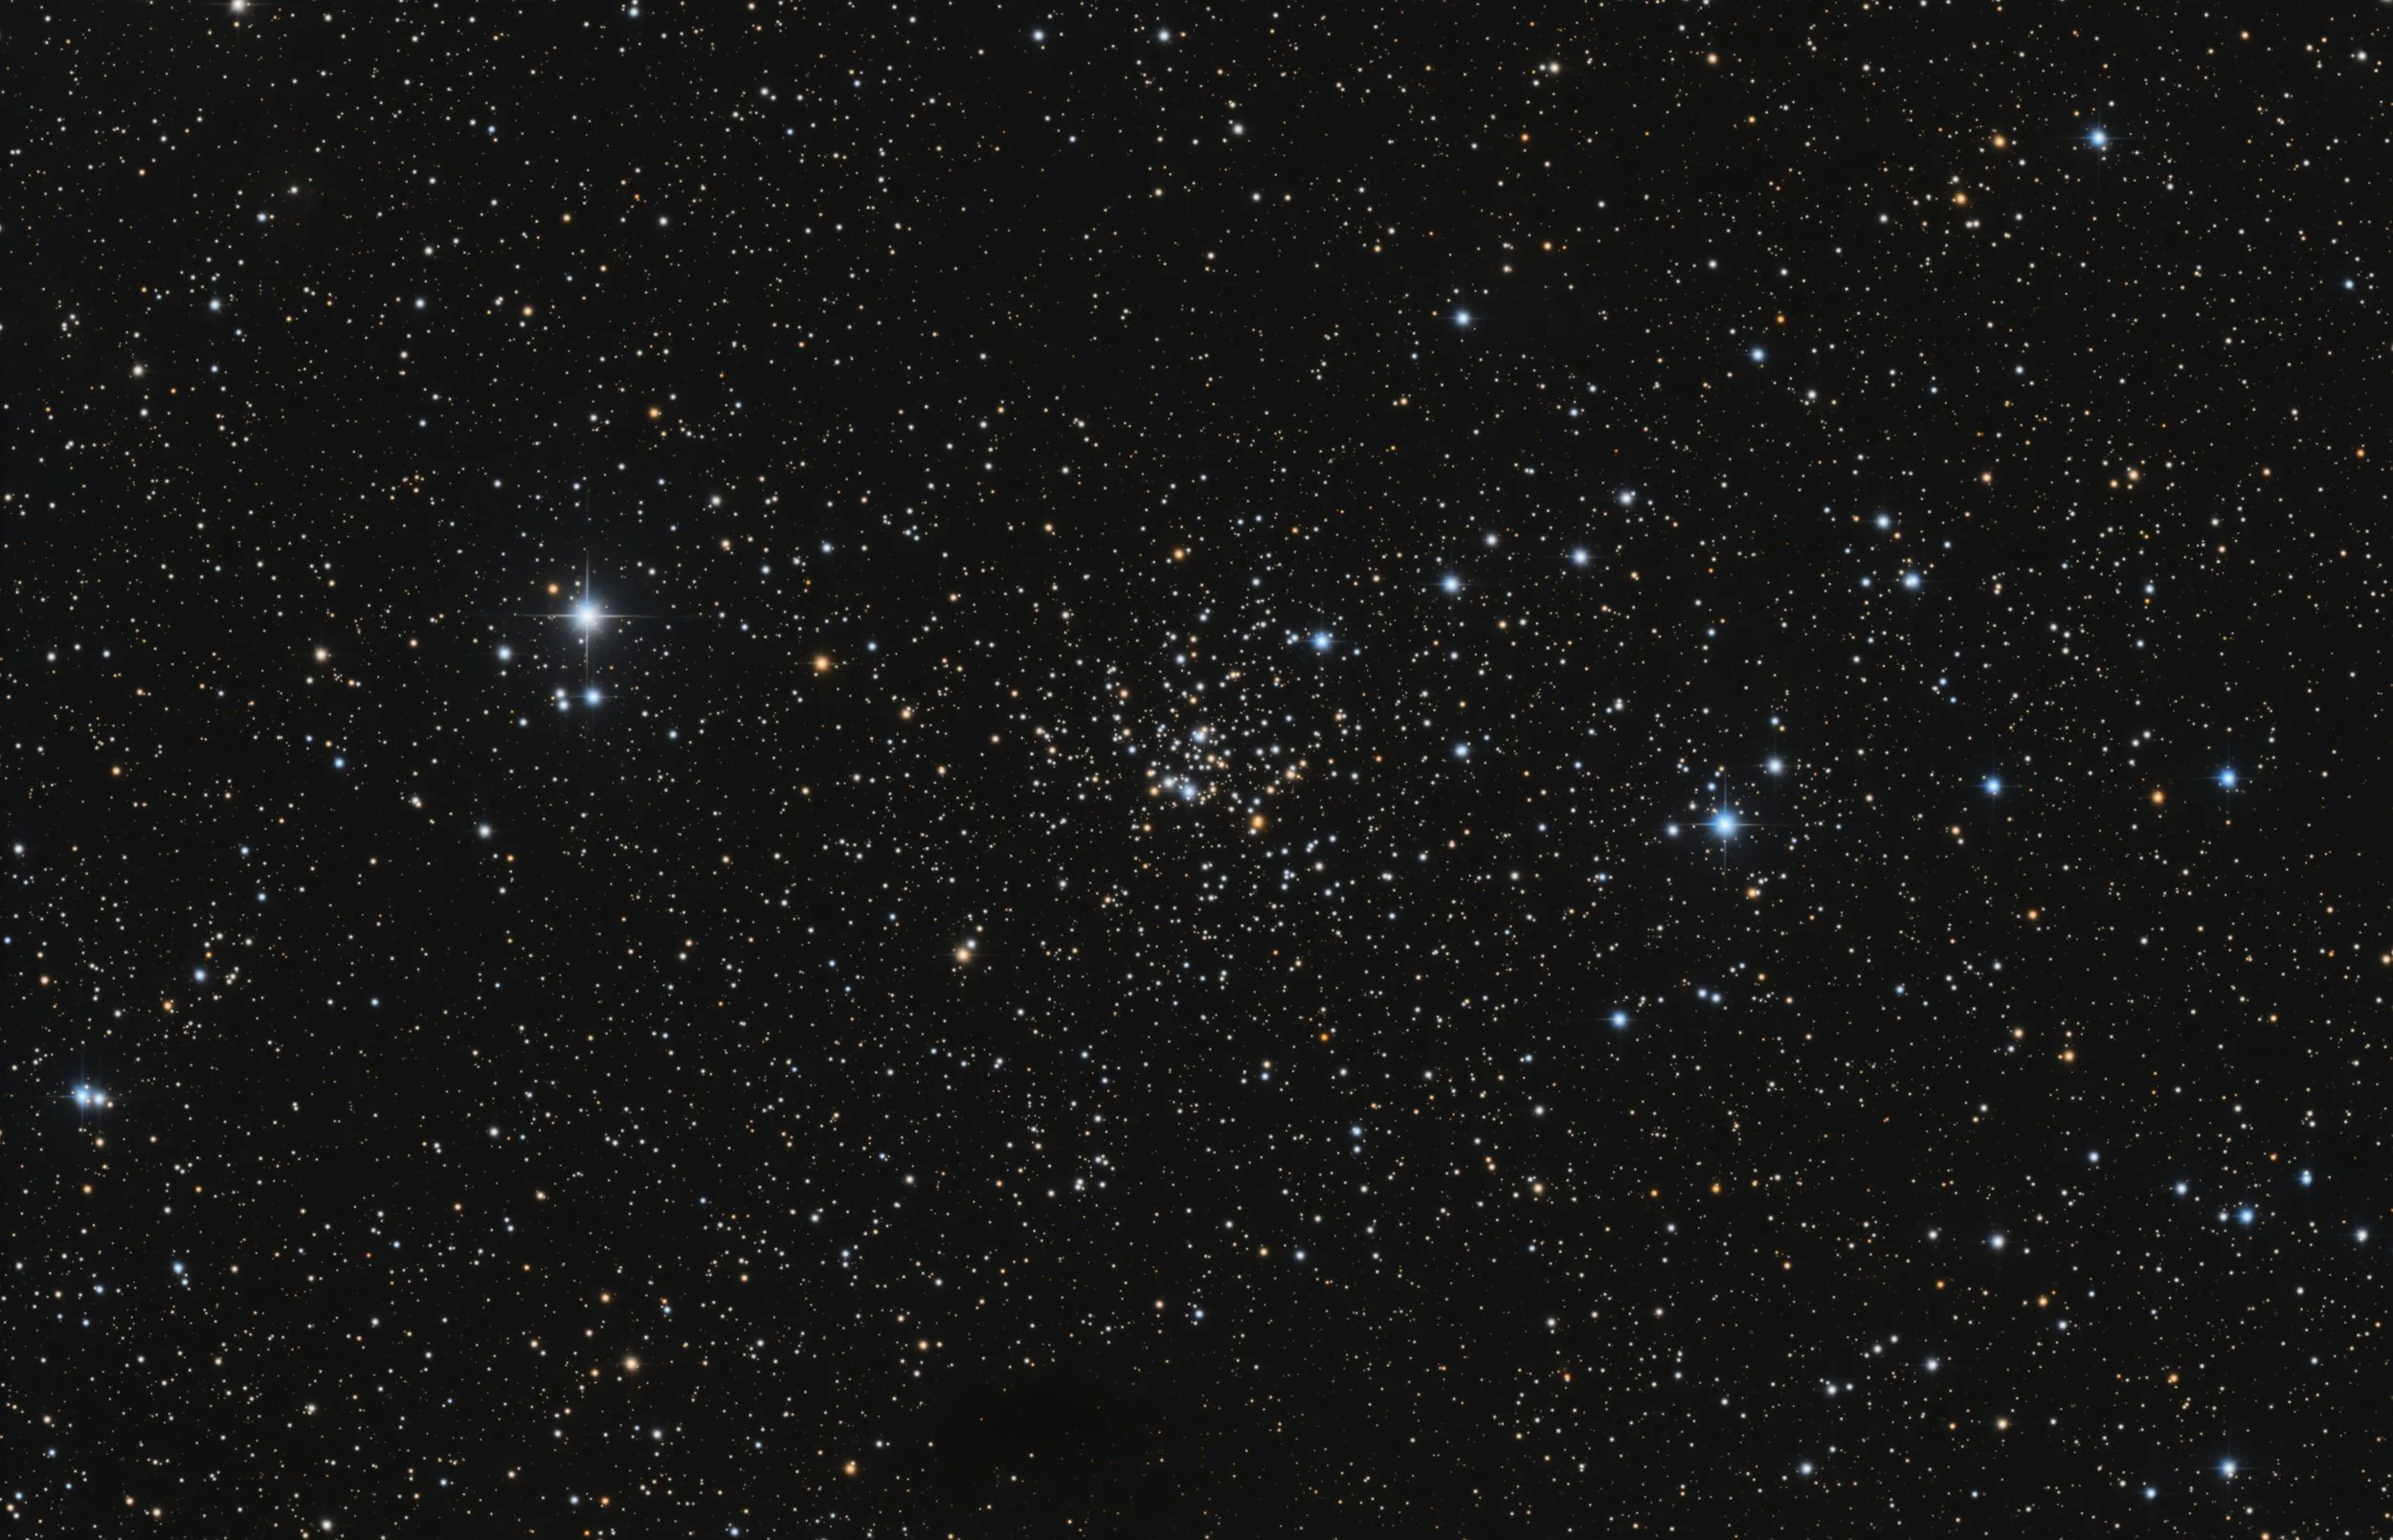

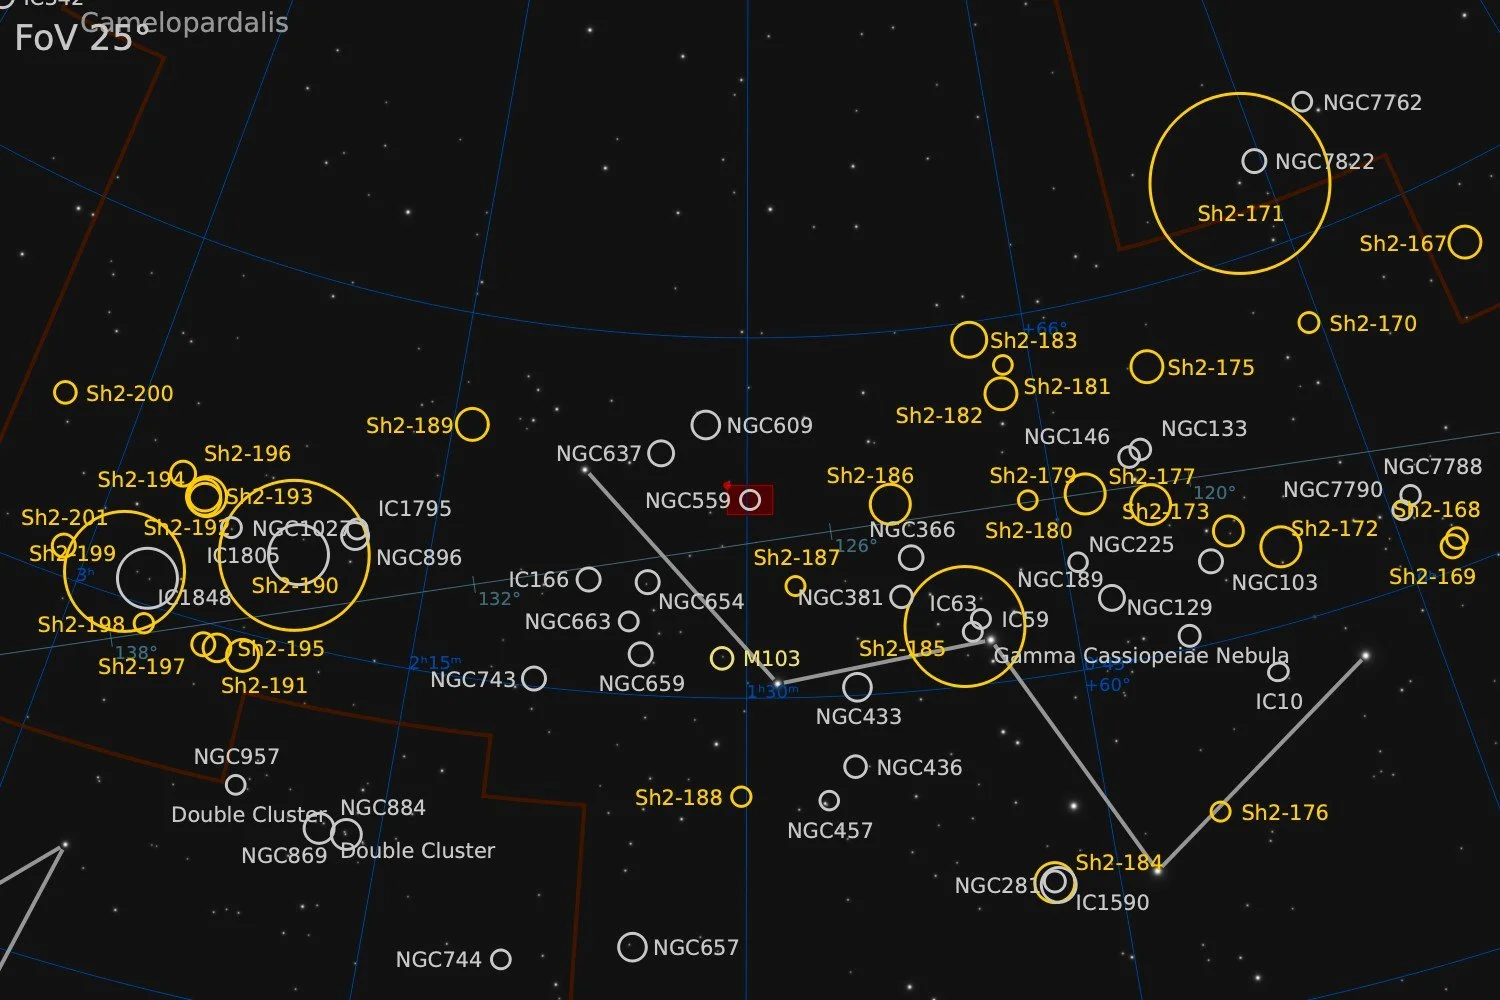
Caldwell 8, also known as NGC 559, is an open cluster in the constellation Cassiopeia. It was discovered by William Herschel on 9 November 1787. About 120 stars populate the cluster, but only about 40 of them are of magnitude 12 or brighter. It is located near the open cluster NGC 637, and the bright magnitude +2.2 irregular variable star Gamma Cassiopeiae. The cluster is 7 arcmins across. The object is also called Ghost's Goblet. This name was coined by astronomer Stephen J. O'Meara, as the center of the star cluster, with a little imagination, is reminiscent of a still photograph of a jeweled goblet that is about to vanish in a ghostly manner. O'Meara attributes the impression of fading to the low brightness (about +12) of many stars in the center as well as to the great age of the star cluster, which is about 1.8 billion years old.
Data Acquisition
Data was collected over 4 nights in November 2025, using a 14” reflector telescope with full-frame camera at the remote observatory in Spain. Data was gathered using standard RGB filters. A total of approximately 7 hours of data was finally combined to create the final image.
Location Remote hosting facility IC Astronomy in Oria, Spain (37°N 2°W)
Sessions
Frames
Equipment
Telescope
Mount
Camera
Filters
Guiding
Accessoires
Software
Planewave CDK14 (2563mm @ f/7.2), Optec Gemini Rotating focuser
10Micron GM2000HPS, custom pier
Moravian C3-61000 Pro (full frame), cooled to -10 ºC
Chroma 2” RGB unmounted, Moravian filterwheel L, 7-position
Unguided
Compulab Tensor I-22, Dragonfly, Pegasus Ultimate Powerbox v2
Voyager Advanced, Viking, Mountwizzard4, Astroplanner, PixInsight 1.9.3
Processing
All processing was done in Pixsinsight unless stated otherwise. Default features were enhanced using scripts and tools from RC-Astro, SetiAstro, GraXpert, CosmicPhotons and others. Images were calibrated using 50 Darks, 50 Flats, and 50 Flat-Darks, registered and integrated using WeightedBatchPreProcessing (WBPP). The processing workflow diagram below outlines the steps taken to create the final image.
Processing a stars-only image in RGB is on paper relatively straightforward. Still there were some aspects I tried out this time, to try to optimize the final result. The first was the question of whether to apply BlurXTerminator (BXT) before or after combining the individual colour channels to an RGB image. Both approaches were tried and results were compared for this image. The conclusion was that applying BXT on the individual channels just gave slightly tighter stars and slightly more uniform colours within each star. So this will be the default approach going forward. It means that SPCC will always be applied after BXT, but this should be no problem, according to the developer of BXT.
The second aspect was to assess the best stretching method for these images. For stars-only images, GHS can give some strange star shapes with very small super bright nuclei and quite some brightness around that central point. PMGUI on the other hand can appear a bit too conservative at times, giving some underwhelming results for an open cluster. A new stretching tool has recently been revealed, named Veralux. While the script is developed for use in Siril, an unofficial porting to PixInsight is available and that is the version that was used here. However, the results were not great. As has been reported by many, the colours come out way too oversaturated and showed a lot more (chroma)noise than other methods. The proper way to apply this script is still being investigated and several YouTube videos have been made about it. It appears that experimenting with several of the default settings can give better results. That was not tried here, and would defeat the purpose a bit of a fully automated stretching method. After trying GHS, PMGUI, StatisticalStretch and Veralux on this image, I also tried the traditional method including a first stretch with a rough ArcsinhStretch for colour, followed by a more precise stretch using HistogramTransformation. Of all the methods applied, I liked the result of this stretch the most. As both ArcsinhStretch and HistogramTransformation are also stretching algorithms that are embedded in GHS, one could probably just use one tool (GHS) to apply both methods, making the workflow just a little bit simpler.
Apart from the experiments done as described above, most of the processing was pretty straightforward. The processing scheme below shows all individual steps applied to this image.
Processing workflow (click to enlarge)
This image has been published on Astrobin.