
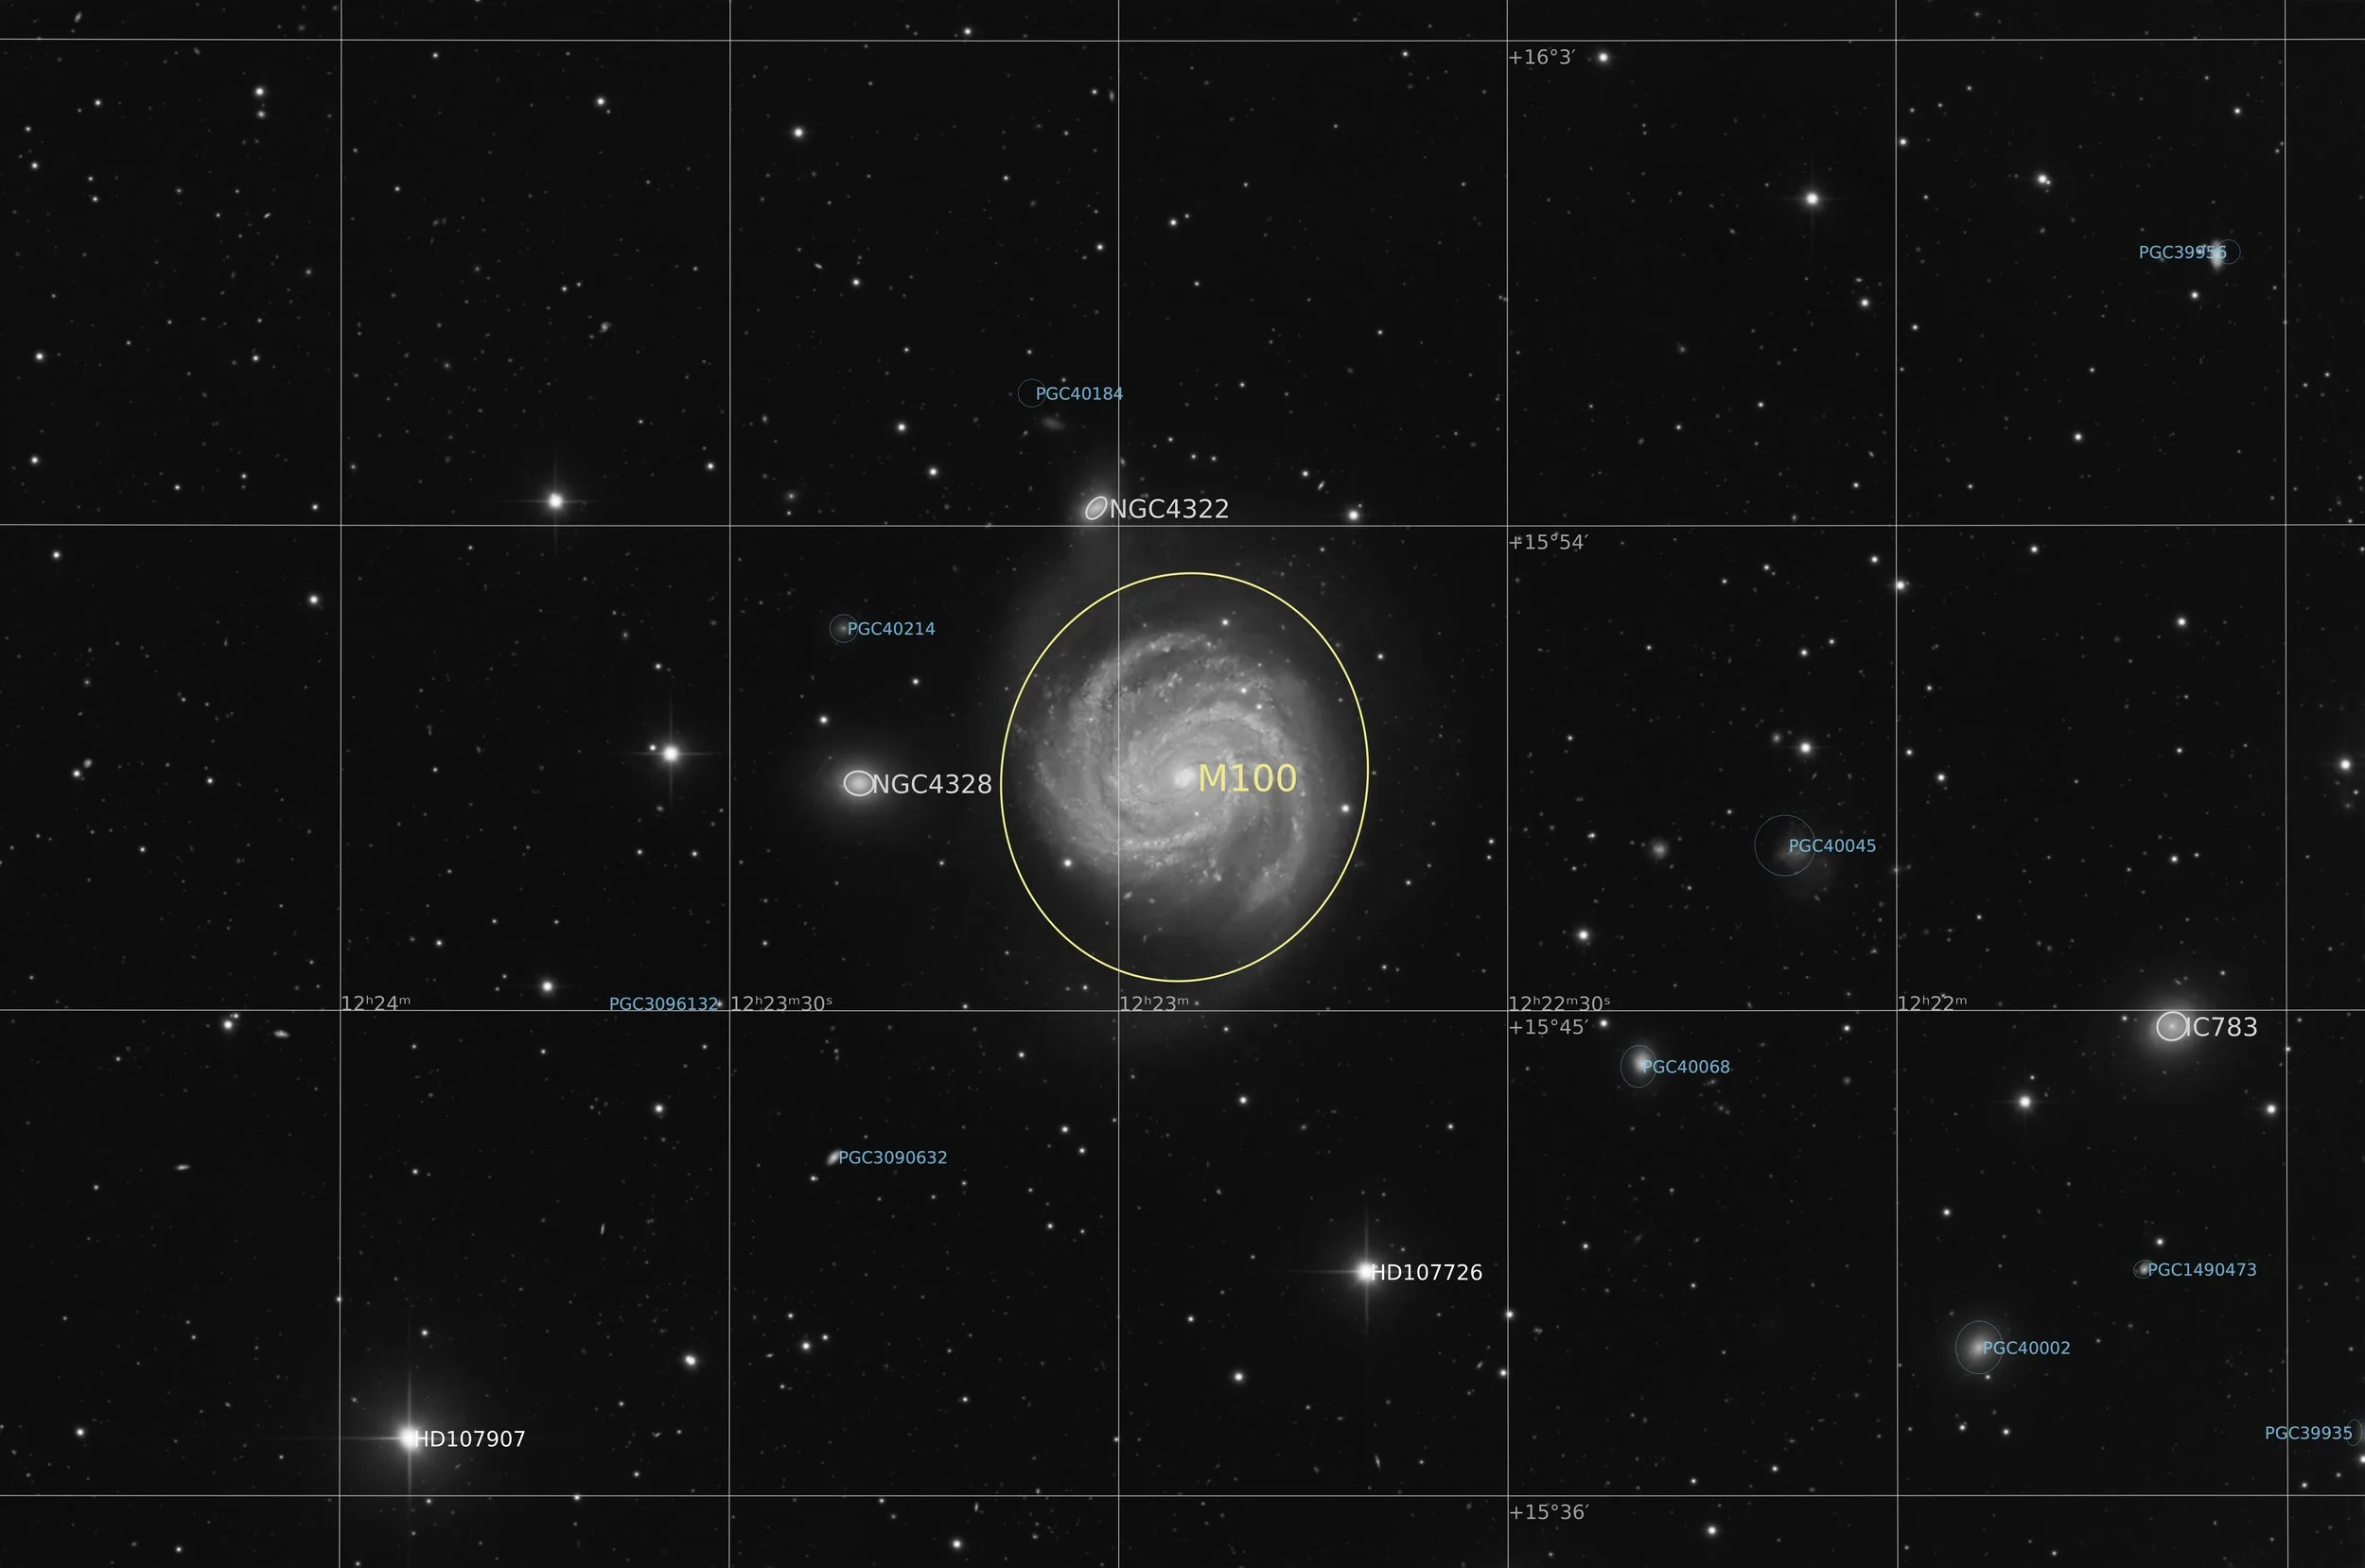
M100
NGC 4321, Mirror Galaxy - NGC4322, NGC 4328, IC 783
43’ x 29’ | 0.3”/px | 8728 × 5788 px | full resolution
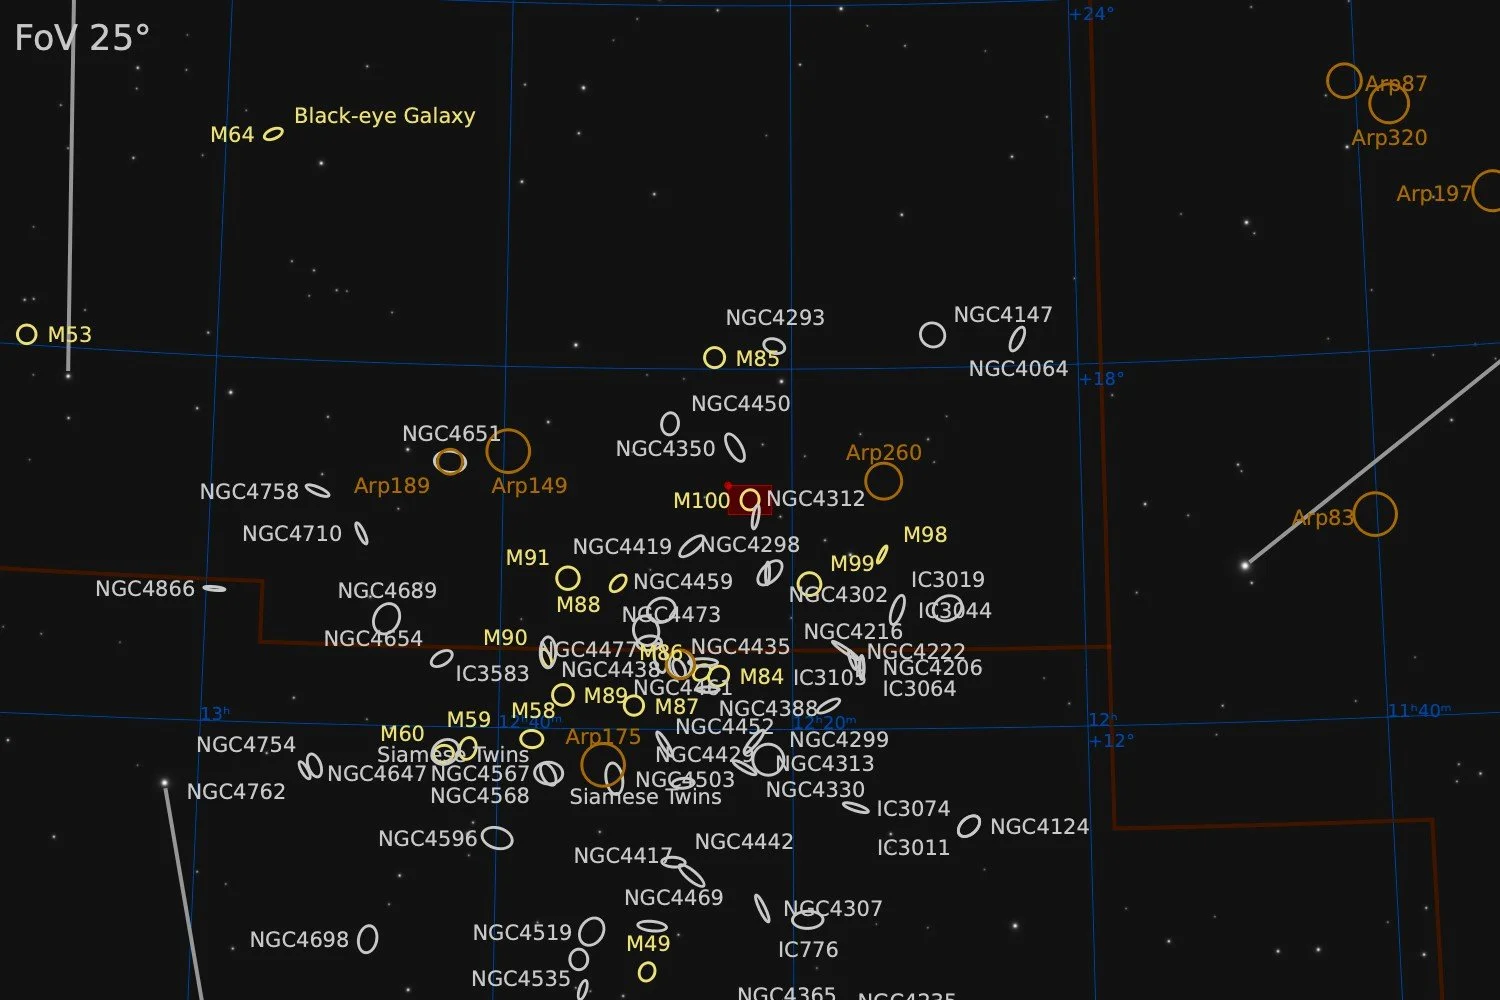
Coma Berenices
RA 12h 22m 55s Dec +15° 49’ 13” | 0°
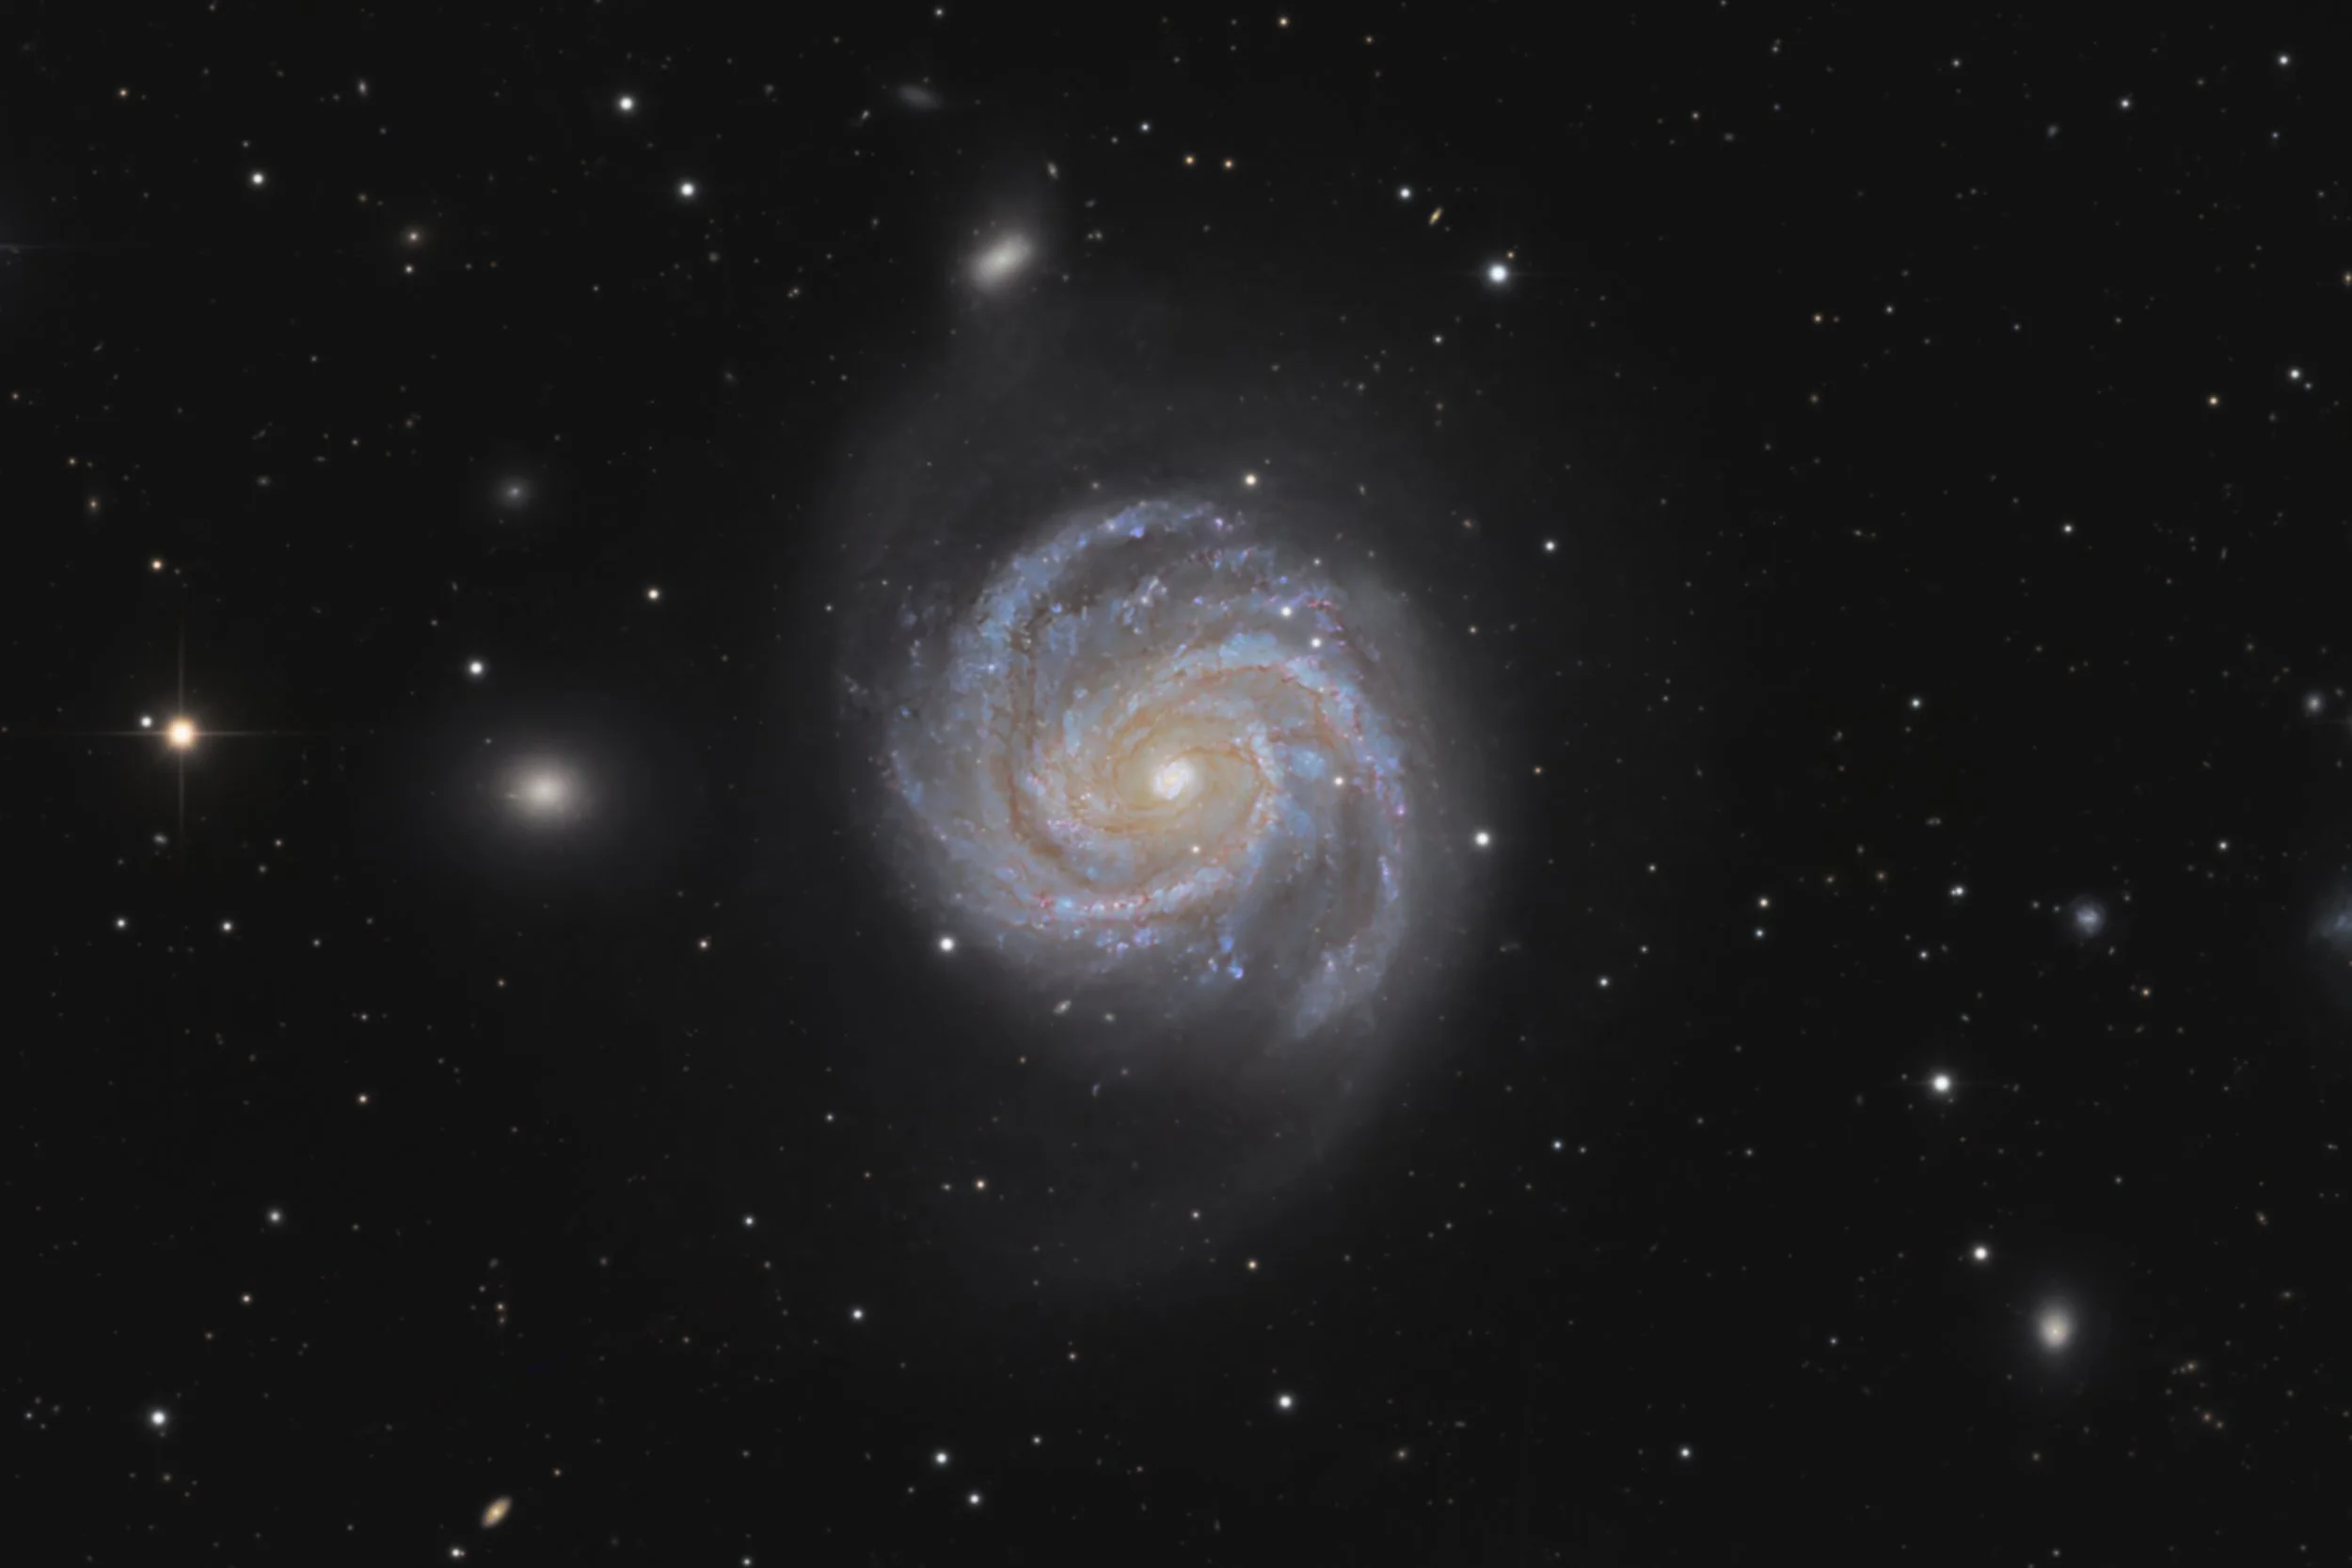
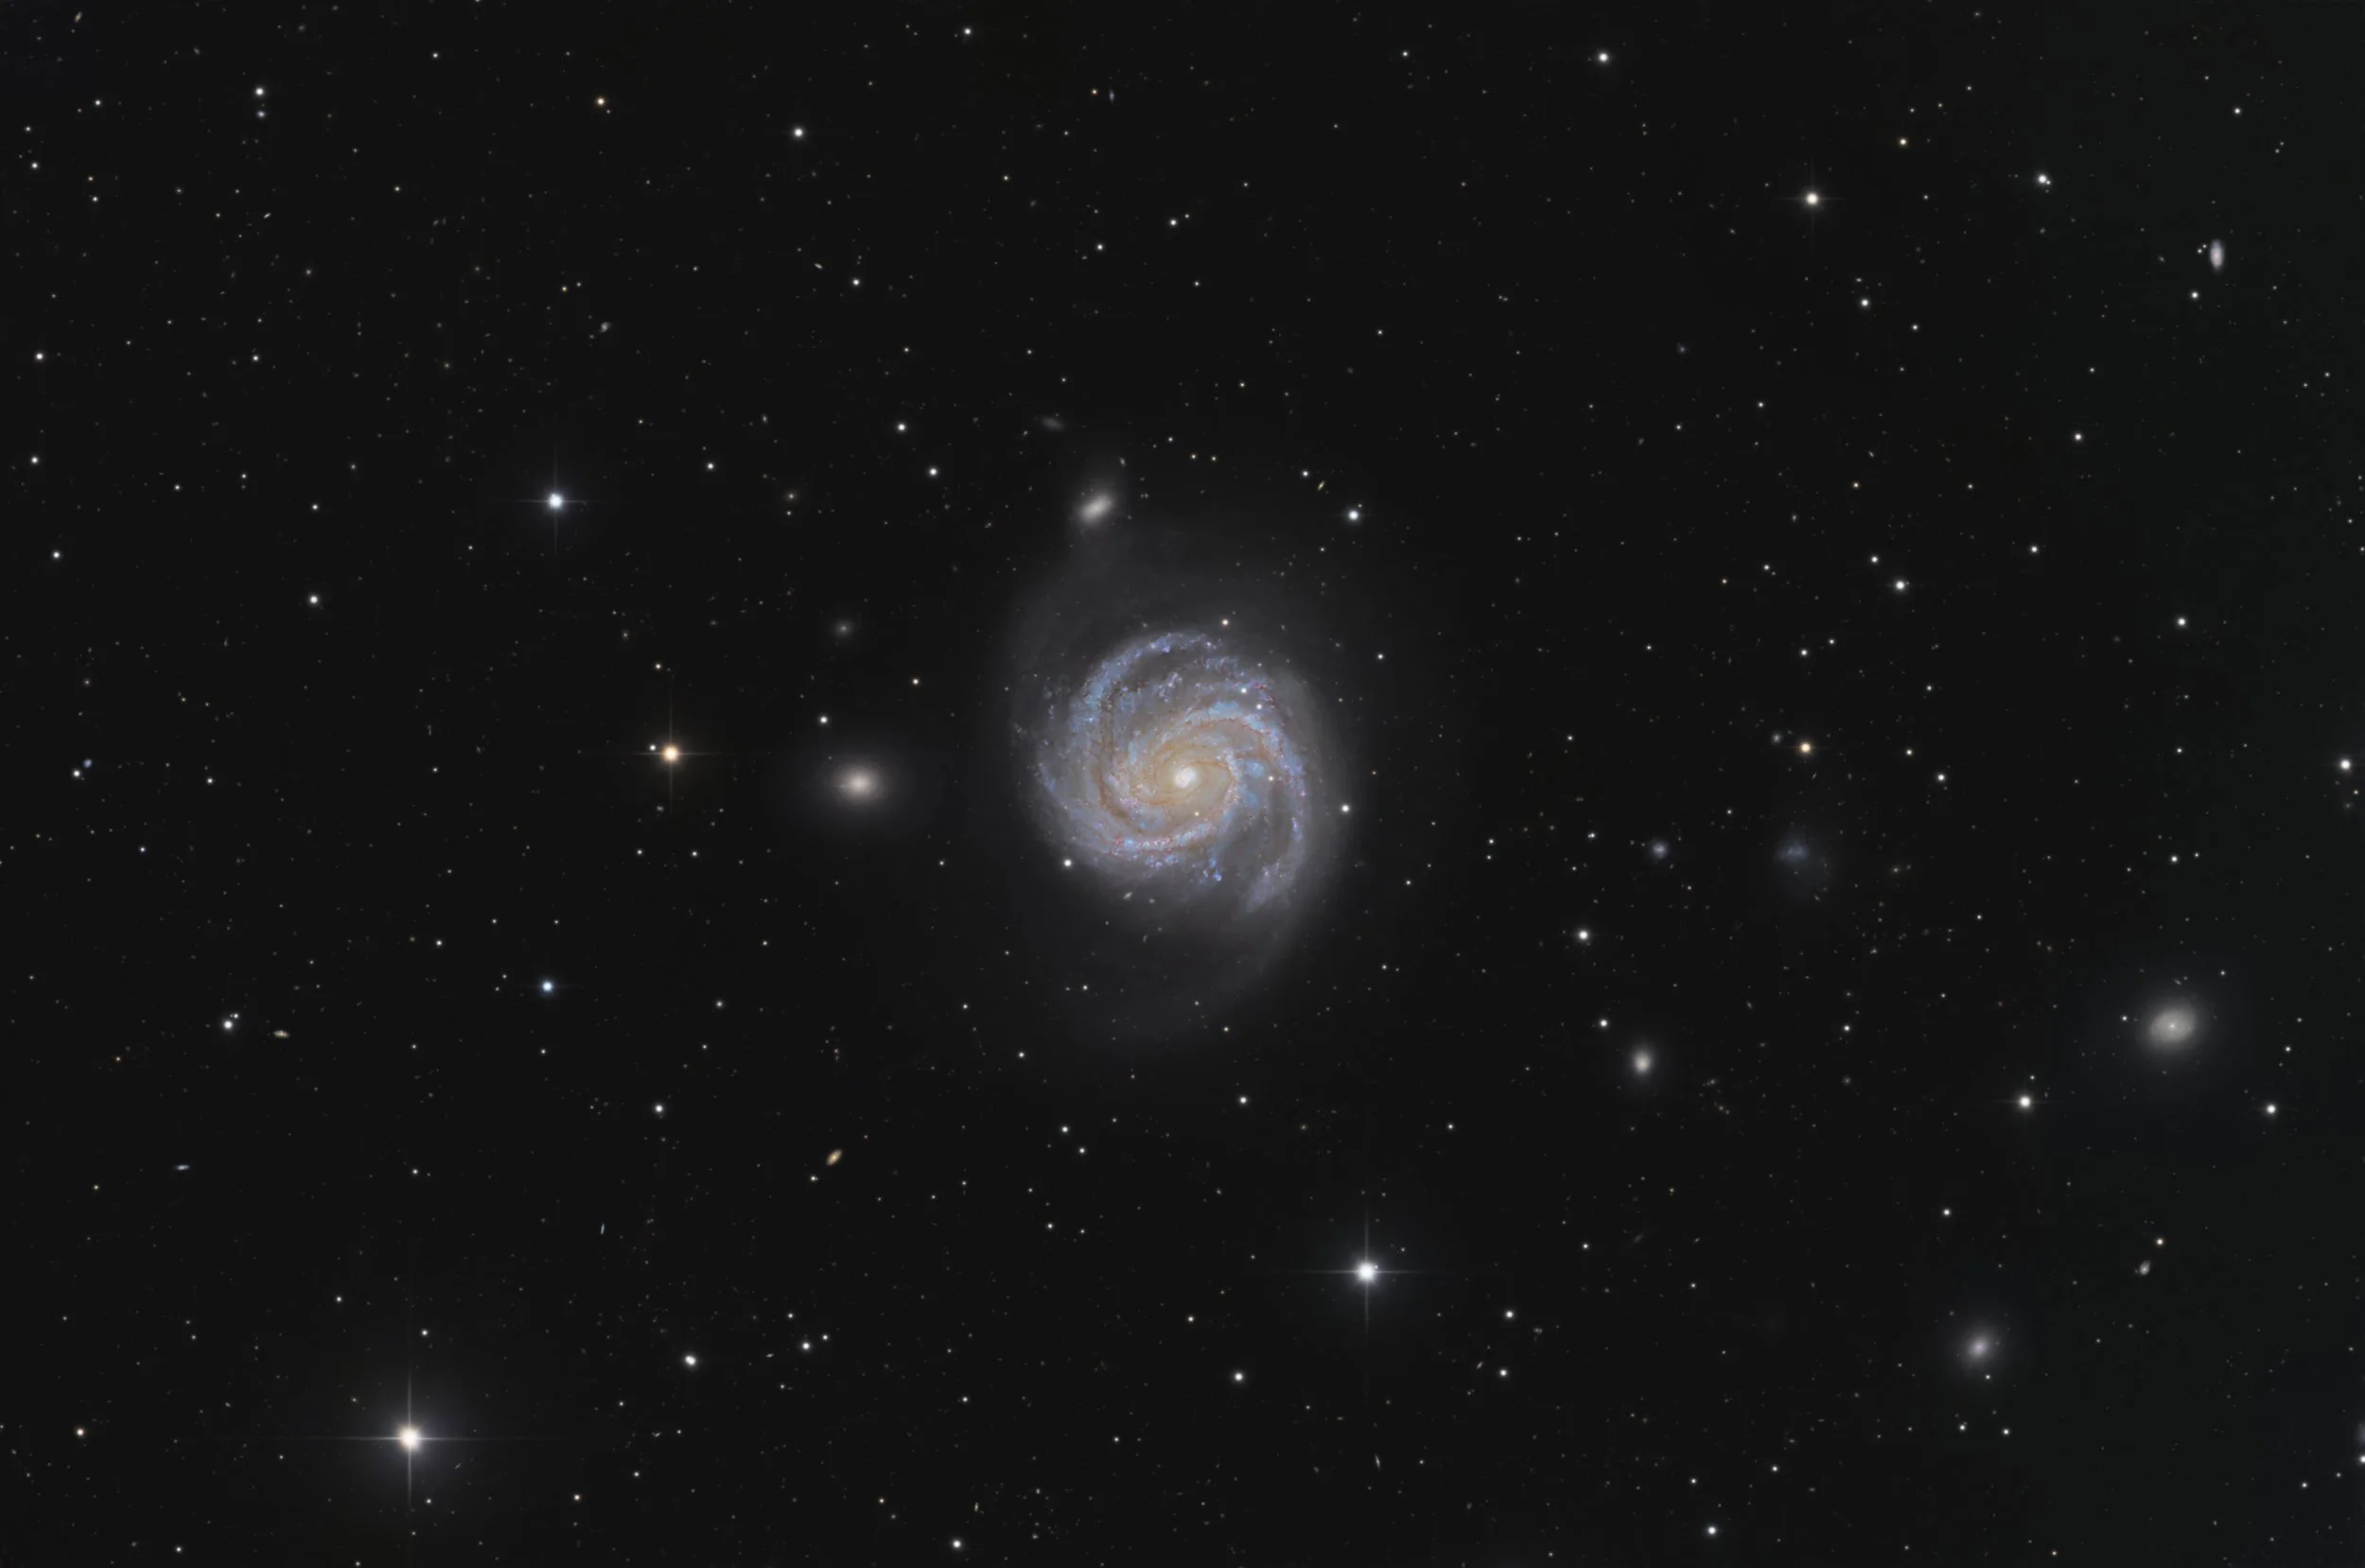
Messier 100 (NGC 4321) is a grand design spiral galaxy located in the constellation Coma Berenices, near its border with Virgo. It was discovered by Pierre Méchain on March 15, 1781, and later observed and catalogued by Charles Messier just days after. The galaxy has no widely used common name, though it is occasionally referred to as the Mirror Galaxy. M100 sits at a distance of approximately 55 million light-years from Earth and is one of the largest and brightest members of the Virgo Cluster. Its face-on orientation reveals two prominent spiral arms and a bright, compact nucleus. The galaxy spans roughly 107,000 light-years in diameter, making it comparable in size to the Milky Way. M100 holds an important place in astronomical history. It was one of the first galaxies imaged by the Hubble Space Telescope in 1993, and those early images helped astronomers calibrate the Hubble constant — the rate of expansion of the universe — by measuring Cepheid variable stars within the galaxy. Several supernovae have also been observed in M100, including SN 1979C, which remains one of the most studied supernovae of the modern era.
Source: Claude.ai
Data Acquisition
Data was collected during 5 nights in March and April 2026, using a 14” reflector telescope with full-frame camera at a remote observatory in Spain. Images collected after April 1 were taken with the same telescope but from a different remote observatory, Roboscopes in Fregenal de la Sierra, Spain. Data was gathered using standard LRGB filters. A total of approximately 18 hours of data was finally combined to create the final image.
Location Remote hosting facility IC Astronomy in Oria, Spain (37°N 2°W) and Roboscopes in Fregenal de la Sierra, Spain (38°N 6°W)
Sessions
Frames
Equipment
Telescope
Mount
Camera
Filters
Guiding
Accessoires
Software
Planewave CDK14 (2563mm @ f/7.2), Optec Gemini Rotating focuser
10Micron GM2000HPS, custom pier
Moravian C3-61000 Pro (full frame), cooled to -10 ºC
Chroma 2” LRGB unmounted, Moravian filterwheel L, 7-position
Unguided
Compulab Tensor I-22, Dragonfly, Pegasus Ultimate Powerbox v2
Voyager Advanced, Viking, Mountwizzard4, Astroplanner, PixInsight 1.9.3
Processing
All processing was done in Pixsinsight unless stated otherwise. Default features were enhanced using scripts and tools from RC-Astro, SetiAstro, GraXpert, CosmicPhotons and others. Images were calibrated using 50 Darks, 50 Flats, and 50 Flat-Darks, registered and integrated using WeightedBatchPreProcessing (WBPP). The processing workflow diagram below outlines the steps taken to create the final image.
This is the first image that contains some data taken from a different location. On April 8, the telescope was moved from the ICAstronomy remote hosting facility to the Roboscopes remote hosting facility in Fregenal de la Sierra, Spain. The data from this new site is very comparable, and perhaps a little bit better due to a fresh collimation of the telescope. For the processing this did not make much difference. More in general the new manual frame selection option in WBPP is a very helpful tool to remove suboptimal frames. In the past these were added to the final stack, relying on the weighting algorithm to assign a very low contribution to the final image. With the new WBPP option I tend to be more strict in which subs make it to the final stack, something that appears to be resulting in a slightly better result.
For background correction, the good-old DynamicBackgroundExtraction was used. No particular reason other than that I wanted to use it again. And to be honest, it is doing a great job and does it fast. Since it is a dynamic process, it is a little bit trickier to run it in a semi-automatic mode using an imagecontainer, but other than that happy with the results.
The stars image required a bit of a cleanup. Some small coloured irregular dots had remained in the stars-only image, which were clearly not stars. They were cleaned up using the CloneStamp tool. When the stars-only image was processed, it was put back into the image using the ImageBlend tool. This does essentially the same as the PixelMath screening function that I normally use. But in ImageBlend there is a bit more control over the relative contribution of the star-only image versus the starless image. In this case the brightness of the stars-only image was enhanced just a little bit.
There were no further peculiarities and the rest of the processing used a fairly standard approach, outlined below.
Processing workflow (click to enlarge)
This image has been published on Astrobin and received Top Pick status.